PASM Camera Modes Explained: When to Use P, A, S, and M
Learn what Program, Aperture Priority, Shutter Priority, and Manual modes control—and choose the simplest camera mode for each photograph.
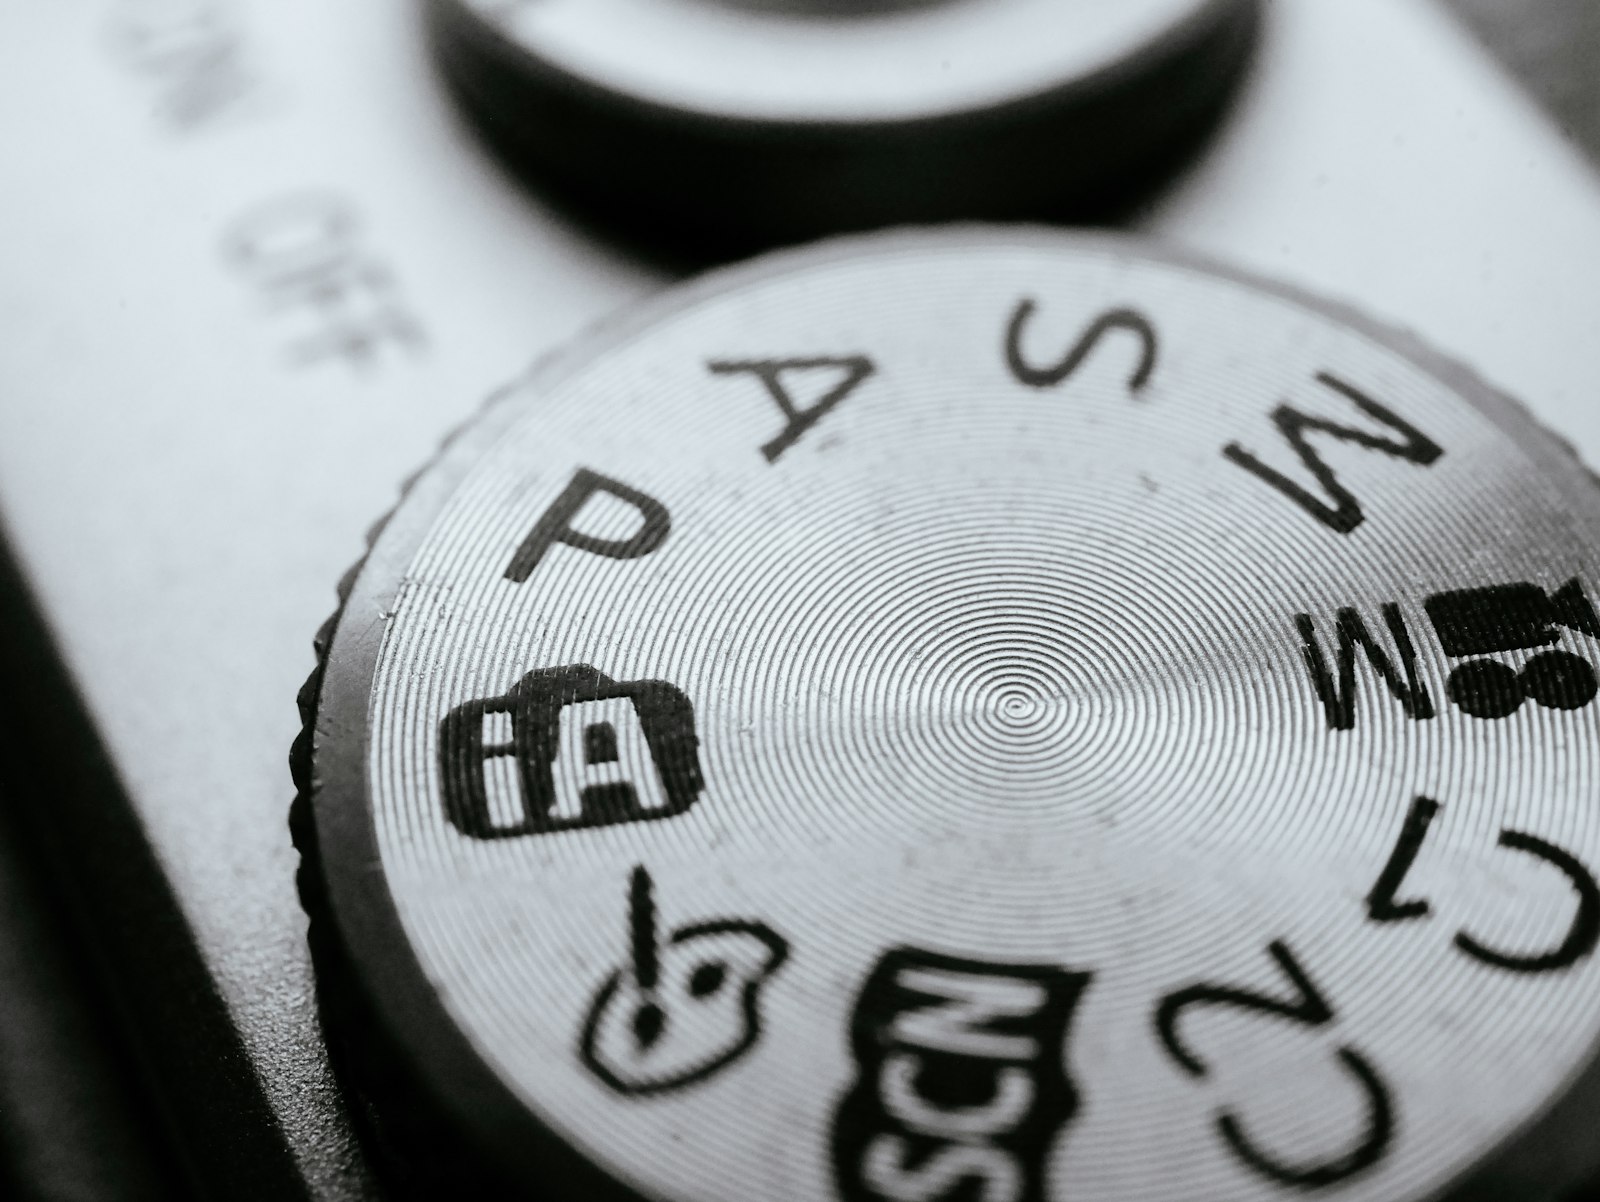
The letters vary slightly by brand. Nikon, Sony, Fujifilm, Panasonic, and OM System usually use P, A, S, and M. Canon commonly uses P, Av, Tv, and M. Av means aperture value, while Tv means time value. The underlying choices are the same.
What PASM modes actually control
A camera exposure involves aperture, shutter speed, and ISO. In PASM modes, you decide which settings are fixed and which the camera may adjust through its meter.
- P — Program: camera selects aperture and shutter speed.
- A or Av — Aperture Priority: you select aperture; camera selects shutter speed.
- S or Tv — Shutter Priority: you select shutter speed; camera selects aperture.
- M — Manual: you select aperture and shutter speed.
ISO may be manual or automatic in any of these modes depending on the camera. Autofocus, drive mode, white balance, metering, file type, and many other settings remain separate from PASM.
Program mode: responsive general photography
In Program Auto, the camera meter chooses an aperture and shutter-speed pair for the available light. Unlike full Auto, P mode normally leaves you in control of ISO, exposure compensation, focus mode, drive mode, white balance, flash, and other creative settings.
P mode is useful when the moment matters more than a particular depth of field or motion effect:
- walk-around travel and family photography;
- fast-changing candid moments;
- using an unfamiliar camera;
- moving repeatedly between sun and shade; and
- learning focus and composition without controlling every exposure variable.
Program Shift
Many cameras offer Program Shift. Turning a dial changes the selected aperture and shutter-speed combination while maintaining similar metered brightness. For example, the camera might shift from 1/125 second at f/8 to 1/500 at f/4. The second pair freezes more motion and gives shallower depth of field.
Program Shift usually resets after a short time, after the camera sleeps, or when light changes. Behavior varies, so check the manual.
What to watch in P mode
Program is not permission to ignore the displayed settings. The camera may choose a shutter too slow for a moving person or an aperture too wide for a group. Glance at both before pressing the shutter, then use Program Shift, raise ISO, or switch modes when one value matters.
Aperture Priority: control depth of field
In Aperture Priority, you select the f-number and the camera chooses shutter speed for its metered exposure. With Auto ISO enabled, the camera may also change ISO according to your configured limits.
A or Av is a strong everyday default because aperture influences depth of field and lens rendering, while the camera can respond quickly to light changes.
Use it for:
- portraits where background separation matters;
- landscapes where foreground-to-background sharpness matters;
- street and travel scenes with moderate movement;
- architecture, products, food, and still life; and
- tripod photography where a slower shutter is acceptable.
The Aperture Priority trap
As light falls, the camera lengthens shutter time. A setting of f/11 at dusk may quietly produce 1/15 second and unwanted blur. Aperture Priority does not protect motion unless you watch shutter speed or configure Auto ISO with an appropriate minimum.
If the shutter becomes too slow, open the aperture, raise ISO, add light, stabilize the camera, or accept intentional motion. Our f-stop guide explains the depth-of-field tradeoff.
Shutter Priority: control how movement looks
In Shutter Priority, you select exposure time and the camera chooses aperture. It is useful when motion is the deciding visual factor:
- sports, birds, wildlife, and running children;
- panning with cyclists or vehicles;
- water rendered sharp, textured, or smooth;
- handheld work where a minimum safe speed matters; and
- propellers, wheels, and performers that need some motion blur.
The Shutter Priority trap
A lens has a widest and narrowest aperture. If you request 1/2000 second in dim light, the camera may open the lens fully and still be unable to reach the expected brightness. A value may blink, a scale may show underexposure, or Auto ISO may rise to its maximum.
The opposite occurs with a long shutter in bright light: the lens can close only so far. Lower ISO or a neutral-density filter may be required.
Choose the slowest shutter that gives the motion result you need rather than using the fastest available setting automatically. See the shutter-speed stops guide for practical starting values.
Manual mode: lock the exposure variables
In Manual exposure, you select aperture and shutter speed. With manual ISO, all three exposure controls remain fixed. The camera meter becomes a guide instead of changing settings for you.
Manual mode is valuable when light on the subject stays consistent but the camera's view changes:
- studio lighting and flash;
- indoor sports under stable venue lights;
- panoramas that must stitch consistently;
- time-lapse sequences;
- stage performers against alternating dark and bright backgrounds;
- backlit portraits where composition would confuse automatic metering; and
- long exposures, astrophotography, and Bulb mode.
Suppose a player is evenly lit while running past a dark crowd and a bright advertising board. Automatic exposure may brighten and darken each frame as the background changes. Manual settings keep the player's exposure consistent.
Manual mode does not guarantee correct exposure
M mode prevents the camera from changing aperture and shutter speed. It does not determine which values are appropriate. You still need to read the light, histogram, highlight warning, or external meter and adjust when the light itself changes.
Use Manual mode for consistency, not status. Use an automatic mode when adapting to changing light is more valuable than locking settings.
Manual mode with Auto ISO
Many cameras allow Auto ISO in M mode. You choose aperture for depth of field and shutter speed for motion; the camera varies ISO to maintain its metered brightness.
This combination works especially well for action moving through changing light. For example, set 1/1000 second and f/4 for a bird in flight, then let ISO rise in shade and fall in sun.
Because ISO remains automatic, this is still automatic exposure even though the dial says M. Exposure compensation often lets you bias the Auto ISO result, although support and control behavior vary by model.
Exposure compensation in P, A, and S
The meter aims for a brightness based on its reading, not on your intention. In P, A, and S modes, exposure compensation tells the camera to make the metered result brighter or darker.
Use positive compensation for a bright subject that the camera makes too gray, such as snow or a white wall. Use negative compensation when dark surroundings are being lifted too much or when important highlights need protection.
Compensation may change shutter speed, aperture, ISO, or a combination depending on mode and Auto ISO settings. It does not physically brighten a flash-lit subject unless flash exposure is also adjusted.
How metering mode fits in
Metering determines which parts of the frame influence the automatic exposure calculation. Common options include multi-zone or evaluative, center-weighted, and spot metering.
PASM determines who controls each variable; metering determines what the camera considers when it controls one. Changing to Manual with manual ISO stops the meter from altering exposure, but the meter display can still provide a recommendation.
What about Auto and scene modes?
Full Auto may control focus area, drive, color, flash, and other settings in addition to exposure. Scene modes such as Portrait, Sports, Landscape, and Night Portrait apply groups of decisions designed for a recognizable situation.
They are useful when speed matters and the camera's assumptions match your subject. PASM modes become more useful when you need to change one part of that recipe without losing control of the others.
A simple mode-selection method
- Does motion need a specific look? Start with S/Tv, or M with Auto ISO for action.
- Does depth of field matter most? Start with A/Av.
- Must a sequence remain consistent? Use M and lock ISO when the subject light is stable.
- Do neither aperture nor shutter need protection? Use P and watch the displayed pair.
This method chooses a mode from the photograph's constraint rather than from habit.
Practical starting setups
Everyday walk-around
Use P or A, Auto ISO, single autofocus for still subjects or continuous autofocus for movement, and exposure compensation on an accessible button or dial.
Portrait outdoors
Use A/Av, choose an aperture that keeps the required facial features sharp, set Auto ISO with a minimum shutter appropriate to subject movement, and use exposure compensation for skin and background brightness.
Field sports
Use S/Tv with Auto ISO or M with Auto ISO. Begin around 1/1000 second, choose enough depth of field, and monitor the ISO ceiling and highlights.
Landscape on a tripod
Use A/Av when changing light should automatically change shutter time, or M when frames must match. Choose aperture and focus placement for the scene, use low ISO when practical, and trigger without moving the camera.
Studio flash
Use M with manual ISO. Choose shutter speed within flash synchronization limits, aperture for flash exposure and depth, and adjust flash power or distance deliberately.
A four-mode practice exercise
- Photograph one static outdoor scene in P and note the chosen aperture and shutter speed.
- Switch to A/Av and choose a wide and narrow aperture. Watch shutter speed change.
- Switch to S/Tv and choose a fast and slow shutter. Watch aperture change and note any warning.
- Switch to M and reproduce one of the earlier aperture-and-shutter pairs. Change composition and see that the settings remain fixed.
- Turn on Auto ISO in M, if supported, and move between sun and shade. Observe which value now changes.
Common PASM mistakes
- Using M because it seems more advanced. Choose it when locked settings solve a real problem.
- Ignoring shutter speed in A mode. The camera may choose a blur-producing value.
- Ignoring aperture warnings in S mode. The lens may have reached its limit.
- Confusing Manual exposure with manual focus. They are independent controls.
- Forgetting Auto ISO in M. The camera may still change image brightness automatically.
- Leaving old compensation active. Return it to zero when the reason for the adjustment ends.
For a complete first-day setup and shooting routine, continue with How to Use a Camera for Beginners.
Sources and further reading
The mode behavior was checked against Sony's official M Mode, Shutter Speed and S-Mode, and Aperture and A-Mode guides. Program Shift behavior was verified with Sony's Program Shift reference. Exact dial labels and Auto ISO behavior vary by camera, so the model manual remains authoritative.
Frequently Asked Questions
-
Program mode is a flexible starting point, while Aperture Priority is useful once you want direct control over depth of field. Beginners do not need to start in Manual mode.
-
Both can choose aperture and shutter speed, but P mode normally leaves more settings—such as ISO, focus, drive, white balance, flash, and exposure compensation—under the photographer's control. Exact differences vary by camera.
-
Yes. Professionals use P, A/Av, S/Tv, and M according to the assignment. Aperture Priority is effective when depth of field matters and light changes, while Manual is useful when exposure must remain consistent.
-
No. Aperture and shutter speed are manual, but the camera still changes ISO for automatic brightness. This is often useful for action, and exposure compensation may adjust the target on supported cameras.
-
Use Shutter Priority when freezing, blurring, or panning movement is the primary requirement. Use Aperture Priority when depth of field and lens rendering matter more and you can monitor the resulting shutter speed.