Shutter Speed Stops Explained
Learn how shutter-speed stops change exposure, how to freeze or blur motion, and how to avoid both camera shake and subject movement.
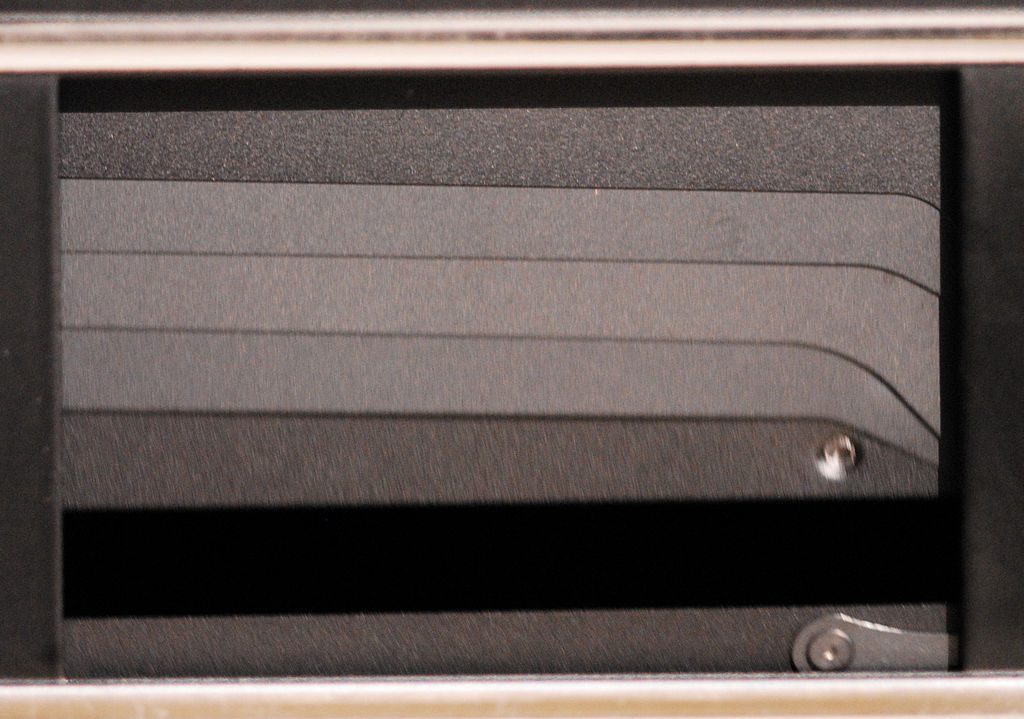
Shutter speed is usually expressed as a fraction of a second, although long exposures may last whole seconds or minutes. The chosen time affects both exposure and the way movement appears.
What shutter speed means
Shutter speed is the exposure time during which the sensor or film records light. A setting of 1/1000 second records a very short interval. A setting of 1 second collects light—and subject movement—for much longer.
Camera displays often save space by showing only the denominator. A display reading 250 commonly means 1/250 second, not 250 seconds. Whole seconds may appear with a quotation mark, such as 2" for two seconds. Check your camera manual if the notation is unclear.
The full-stop shutter-speed sequence
A common full-stop sequence is:
1 second → 1/2 → 1/4 → 1/8 → 1/15 → 1/30 → 1/60 → 1/125 → 1/250 → 1/500 → 1/1000 → 1/2000 → 1/4000 second
Each step to the right roughly halves the exposure time and captured light. Each step to the left doubles them. The rounded values 1/15, 1/30, 1/60, and 1/125 are conventional approximations.
- 1/250 second admits twice as much light as 1/500.
- 1/1000 admits half as much light as 1/500.
- 1/60 admits four times as much light as 1/250.
Most modern cameras change shutter speed in half-stop or one-third-stop increments, so you will also see values such as 1/320, 1/400, and 1/640. Three one-third-stop clicks equal one full stop.
Fast shutter speeds freeze motion
A fast shutter records less change in subject position during the exposure. The speed required is not fixed because motion varies.
Use these as test points rather than guarantees:
- 1/125–1/250 second: people standing or walking slowly, casual gestures, and many everyday scenes.
- 1/500 second: active children, moderate street movement, and slower sports action.
- 1/1000 second: running athletes, pets, many field sports, and larger birds in flight.
- 1/2000–1/4000 second: fast wings, splashes, motorsports, or motion moving rapidly across the frame.
A subject traveling sideways across the frame usually needs a faster setting than one moving directly toward the camera at the same real speed. A nearby subject crosses more of the frame during the exposure than a distant one. High-resolution files and large prints also reveal smaller amounts of blur.
Use continuous autofocus and an appropriate burst mode when timing is unpredictable, but remember that no shutter speed can repair focus placed on the wrong distance.
Slow shutter speeds show motion
Blur is not always a failure. A slow shutter can describe movement in a way the eye does not see directly.
- 1/30–1/8 second: slight movement in people, handheld intentional motion, or textured water.
- 1/4–2 seconds: smooth water, moving crowds, and short vehicle-light trails.
- 5–30 seconds: longer trails, soft surf, moving clouds, night scenes, and light painting.
- Minutes: extended star trails, extremely dark scenes, or strong neutral-density-filter effects.
The visual result depends on how fast the subject moves. One second may make a waterfall smooth but barely move a slow cloud. Make a test frame and change by full stops so the difference is easy to judge.
Camera shake and subject motion are separate
Camera shake is blur caused by the camera moving during exposure. Subject motion is blur caused by something in the scene moving. One photograph can contain both.
A tripod, monopod, stable surface, careful handholding, self-timer, remote release, or image stabilization can reduce camera movement. None of them freezes a running person. To stop the runner, you need a shorter exposure or a lighting technique such as brief flash duration.
Image stabilization is still valuable. Lens stabilization or in-body image stabilization can let a stationary scene remain sharp at shutter speeds that would otherwise show hand movement. Its benefit varies with the equipment, focal length, stance, panning mode, subject distance, and photographer.
Diagnose before changing settings: if the whole frame smears in one direction, suspect camera movement; if the background is sharp but the subject blurs, the shutter was too slow for that subject.
The reciprocal handholding guideline
A traditional starting point for a stationary subject is a shutter speed no slower than the reciprocal of the full-frame-equivalent focal length. With a 50mm-equivalent view, begin around 1/50 or 1/60 second. At 200mm equivalent, begin around 1/200 or 1/250.
This is a starting point, not a sharpness law. You may need a faster speed when:
- the subject moves;
- the camera or platform vibrates;
- you use a high-resolution sensor or inspect files closely;
- your stance is unstable; or
- the lens is long and difficult to hold.
You may use a slower speed when stabilization is effective, technique is solid, the subject is still, and the final image will not be viewed extremely large. Shoot a short burst and check detail at high magnification rather than trusting the guideline blindly.
Panning: a sharp subject with a moving background
Panning means following a moving subject with the camera during a relatively slow exposure. When your movement matches the subject, the subject can remain recognizable while the background stretches into directional blur.
Try 1/30–1/125 second for a cyclist or vehicle, depending on speed and distance. Stand securely, begin tracking before pressing the shutter, move smoothly through the exposure, and continue after it ends. Use continuous autofocus and a stabilization panning mode if the equipment offers one.
Panning has a low success rate at first. Practice on repeatable traffic or runners and adjust one stop at a time.
How shutter speed changes exposure
Changing 1/250 to 1/500 second removes one stop of light. To maintain the same image brightness, you can:
- open the aperture by one stop, such as f/5.6 to f/4;
- double ISO, such as ISO 400 to ISO 800; or
- add one stop of illumination.
Each choice changes something else. Opening the aperture reduces depth of field, while raising ISO usually increases noise and reduces highlight range. The exposure triangle guide explains the full relationship, and our f-stop guide covers aperture stops in detail.
Shutter Priority and Manual modes
In Shutter Priority, marked S or Tv, you choose shutter speed and the camera selects an aperture. Auto ISO may also adjust if enabled. This mode is practical when motion is the main concern and light changes as you work.
Watch for a flashing aperture value or exposure warning. It can mean the lens cannot open far enough for the fast shutter you selected or cannot close far enough for a long exposure in bright light.
In Manual mode, you choose both shutter speed and aperture. Auto ISO can still provide automatic brightness on many cameras. Full manual exposure is helpful when the light remains consistent and a sequence must match.
Long exposure, Bulb, and Time modes
Many cameras offer preset shutter speeds down to 30 seconds. For longer exposures, Bulb keeps the exposure active while the release is held, while Time begins with one press and ends with another. Exact behavior varies by camera.
Use a stable tripod, disable features the manual warns against using on a tripod, and trigger the camera without jarring it. Long-exposure noise reduction may make a second dark exposure of similar duration, which can leave the camera unavailable while it processes.
Very long exposures heat the sensor and can increase noise or hot pixels. Batteries also drain, conditions change, and light leaks can become visible. Test before committing to a long sequence.
Mechanical shutter: two traveling curtains
A common focal-plane mechanical shutter uses two curtains close to the sensor. At slower speeds, the first curtain uncovers the sensor, the entire sensor is briefly open, and the second curtain covers it.
Above the camera's flash-sync speed, the second curtain starts closing before the first has fully finished opening. A slit travels across the sensor. Each area receives the selected exposure time, but the whole frame is not uncovered at one instant.
This explains why an ordinary flash cannot usually synchronize at every high shutter speed: one brief flash would illuminate only the part behind the slit. High-speed sync solves this by pulsing the flash while the slit travels, but available flash power falls.
Mechanical shutters can create sound, vibration, and wear. Their physical movement can also produce shutter shock at certain camera, lens, and shutter-speed combinations.
Electronic shutter and rolling shutter
An electronic shutter begins and ends exposure through sensor readout rather than covering the sensor with mechanical curtains. It can offer silent shooting, very fast displayed shutter speeds, and no mechanical shutter wear.
Many sensors do not read every row simultaneously. During this rolling shutter readout, a fast-moving subject or quickly panned camera can change position from the first row to the last. Straight objects may lean, wheels may become oval, and fast motion can bend.
Electronic shutters can also show bands under flickering LED, fluorescent, or other pulsed lighting. Some cameras reduce these problems with faster readout, anti-flicker timing, or a true global shutter that exposes and reads the frame together. Performance varies greatly by model and shooting mode.
Use the mechanical shutter when flash, fast motion, or artificial-light banding makes electronic shutter unreliable. Use electronic shutter when silence, vibration reduction, or burst speed matters and the scene does not trigger its limitations.
Electronic first-curtain shutter
Electronic first-curtain shutter starts exposure electronically and ends it with a mechanical second curtain. It reduces the movement that can cause shutter shock while retaining many mechanical-shutter characteristics.
At very fast speeds and wide apertures, some camera and lens combinations can render out-of-focus highlights unevenly. Consult the camera manual when bokeh or exposure looks unusual.
Shutter speed for video
Video uses shutter speed for every frame. A common starting convention is an exposure time around twice the frame rate: approximately 1/50 second for 24 or 25 fps and 1/60 for 30 fps. This produces motion blur viewers often perceive as natural.
A faster video shutter makes individual frames crisper but movement more staccato. A slower shutter increases blur. The creative choice can override the convention, and flickering lights may require speeds matched to local power frequency.
A practical shutter-speed exercise
- Choose repeatable motion such as running water, a rotating fan, passing bicycles, or a person walking.
- Use Shutter Priority and Auto ISO, with the camera supported if speeds become slow.
- Photograph at 1/1000, 1/500, 1/250, 1/125, 1/60, 1/30, and 1/15 second where conditions allow.
- Compare the moving subject and stationary background separately.
- Choose the amount of motion that communicates the scene, then check whether aperture and ISO remain acceptable.
The goal is not to find one correct speed. It is to learn how each stop changes the description of time.
Common shutter-speed mistakes
- Reading 1000 as one thousand seconds. On most displays it means 1/1000 second.
- Trusting stabilization to freeze a subject. Stabilization addresses camera motion, not the subject's movement.
- Using an unnecessarily fast speed. 1/8000 may force noisy ISO when 1/1000 would freeze the action sufficiently.
- Using a tripod without considering the subject. The camera may be steady while leaves, water, or people blur.
- Ignoring electronic-shutter artifacts. Check for bent motion and bands under artificial lighting.
- Freezing every moving part. Some wheel, propeller, or water blur can make the image feel more natural.
Sources and further reading
The exposure and motion guidance was checked against Nikon's official Understanding Shutter Speed and Capturing or Freezing Motion guides. Shutter Priority behavior and waterfall examples were cross-checked with Sony's Shutter Speed and S-Mode guide. Stabilization claims should always be checked against the manual and rated performance of the exact camera or lens.
Frequently Asked Questions
-
Yes. 1/1000 second is a fast exposure commonly used for sports, running animals, birds, and other action. Whether it is fast enough depends on subject speed, direction, distance, and the amount of blur you accept.
-
One full stop doubles or halves exposure time and captured light. Changing from 1/500 to 1/250 second adds one stop; changing from 1/500 to 1/1000 removes one stop.
-
A traditional starting point is the reciprocal of the full-frame-equivalent focal length, such as about 1/200 second at 200mm equivalent. Stabilization and technique may allow slower speeds, while subject movement, high resolution, or unstable support may require faster ones.
-
Try around 1/250 second for walking people and 1/500 to 1/1000 for running or fast gestures. Review the important detail and adjust because distance, direction, focal length, and intended output change the requirement.
-
Many sensors read the image one row at a time. If the subject or camera moves during that readout, different rows record different positions, creating rolling-shutter leaning or bending. A mechanical shutter or faster sensor-readout mode may reduce it.