Exposure Compensation Explained: When to Use +EV and -EV
Learn how exposure compensation makes automatic camera exposures brighter or darker, what EV means, and when to use positive or negative values.
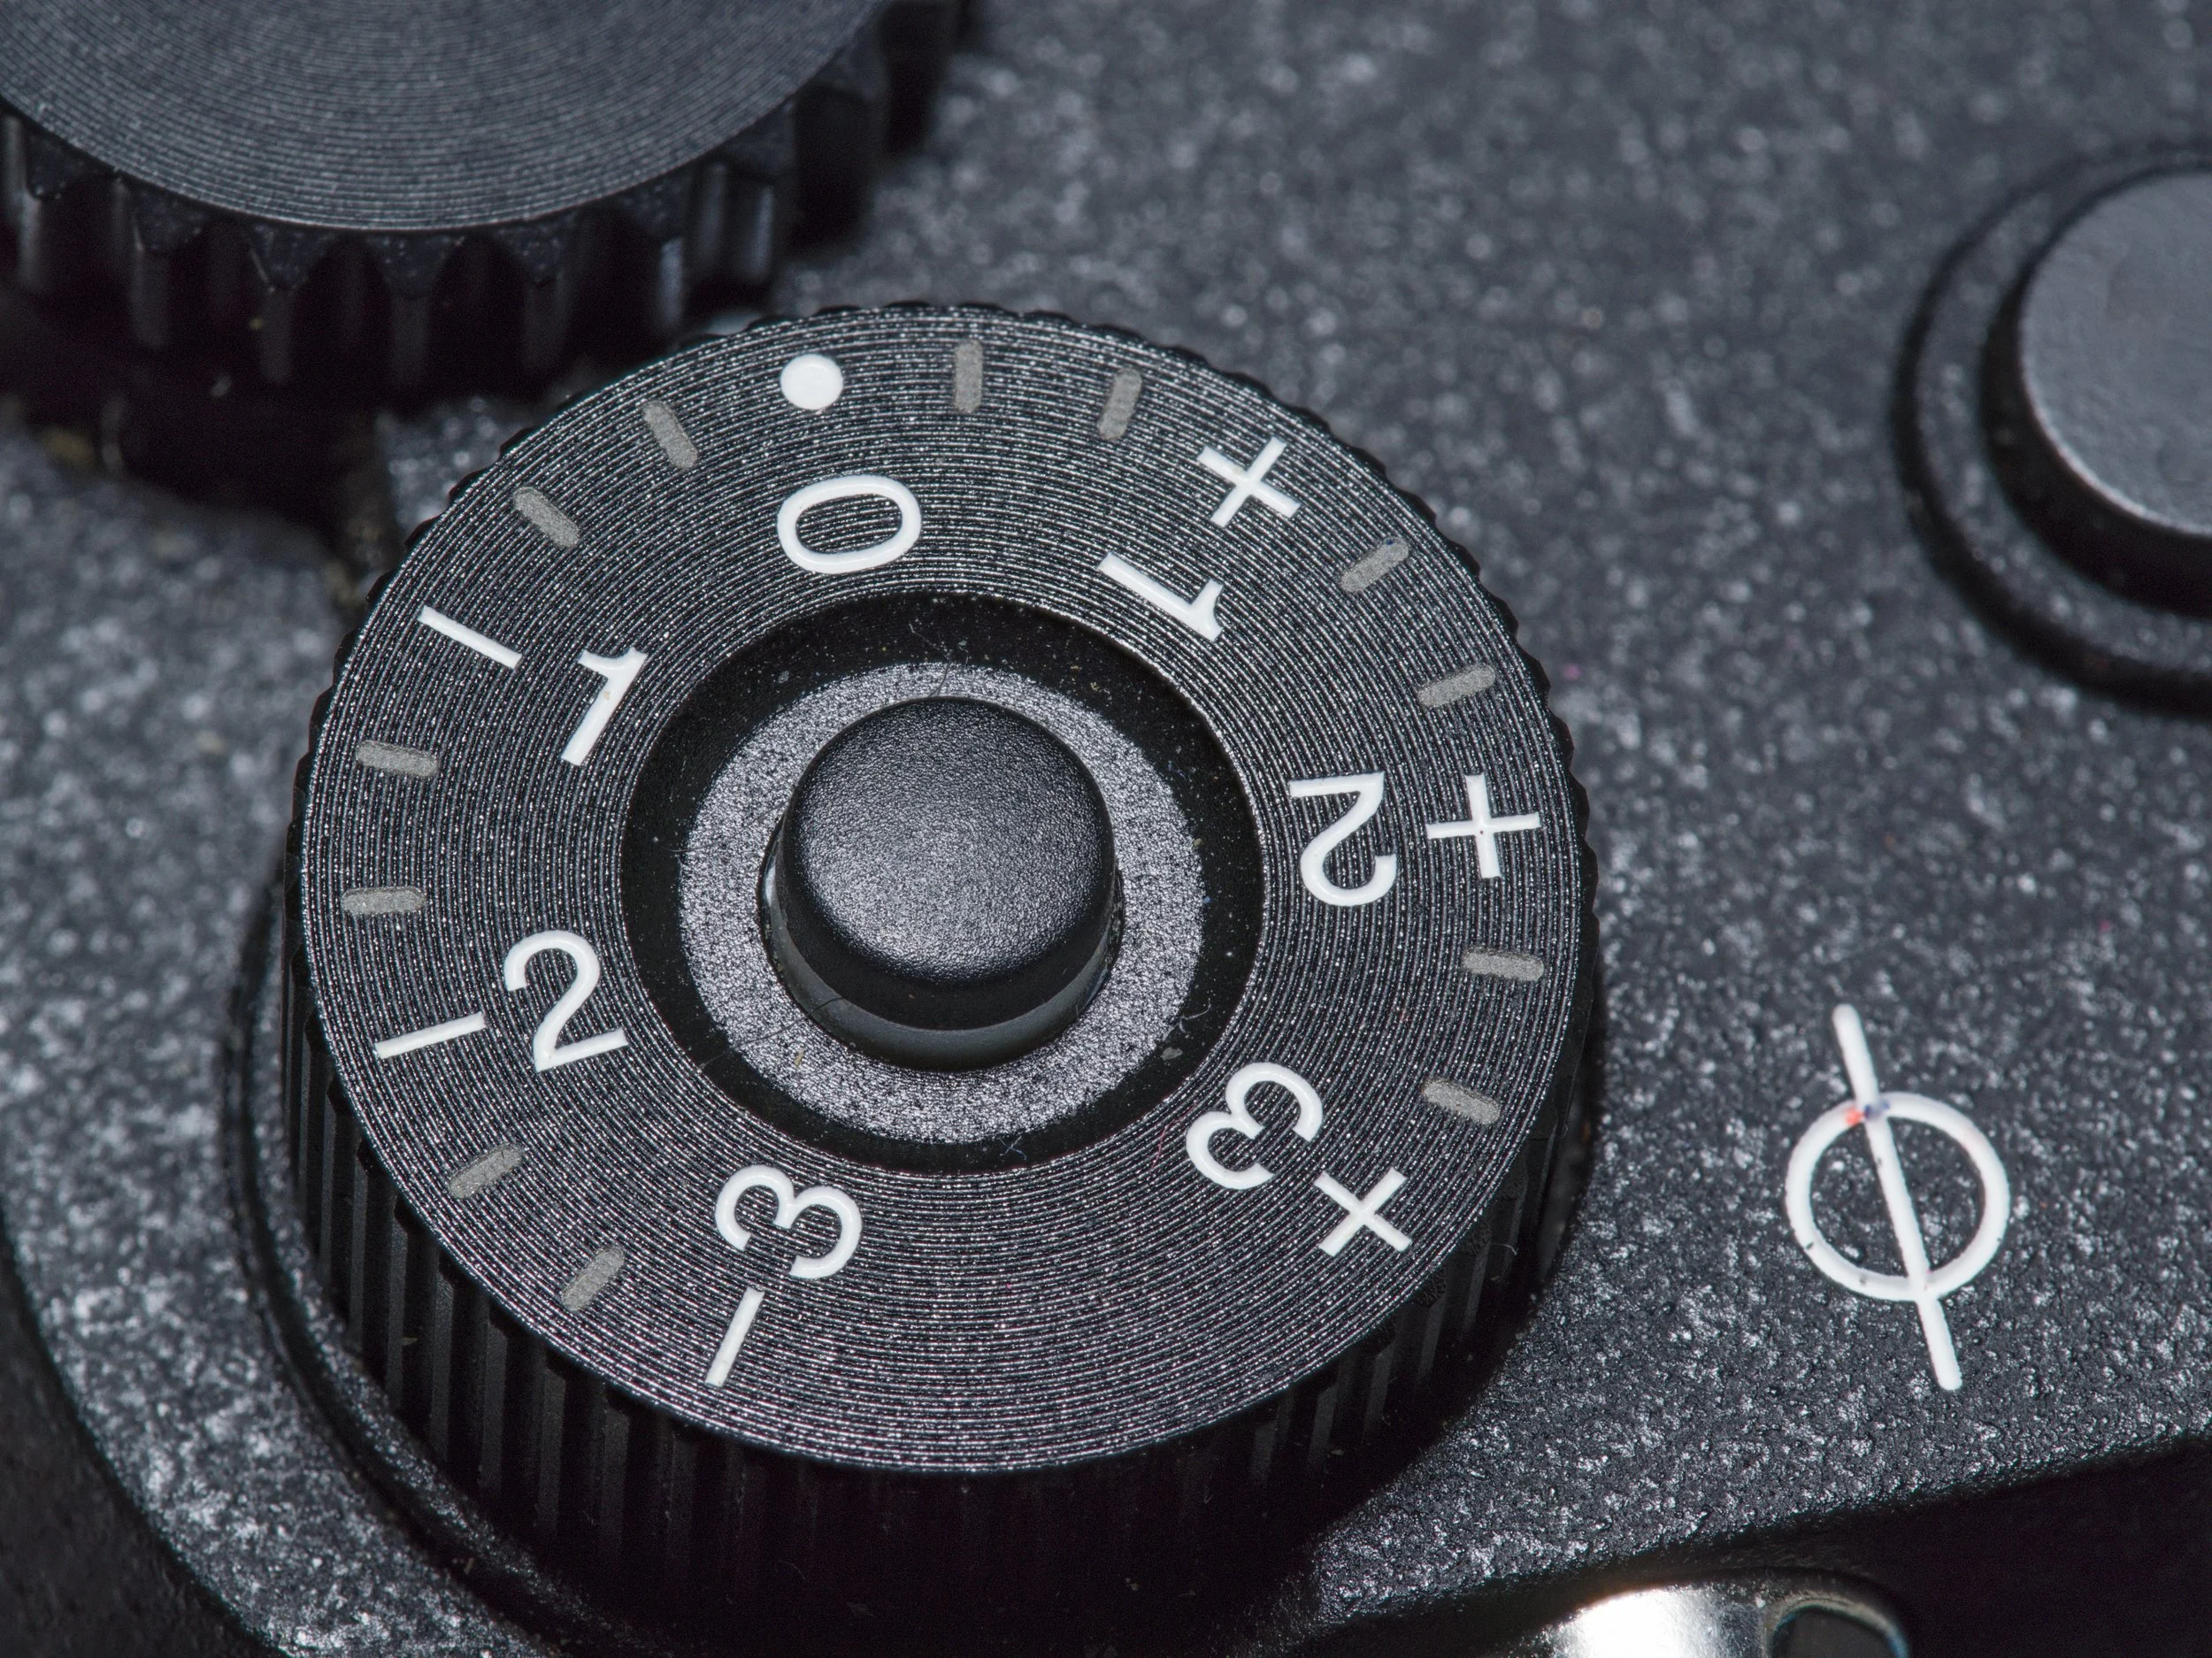
Exposure compensation is usually marked with a +/− symbol. It may have a dedicated dial, a button used with a command wheel, or a menu setting. Most cameras offer at least ±3 EV in one-third-stop steps.
What exposure compensation does
In an automatic exposure mode, the camera meter evaluates the scene and chooses settings for a target brightness. Exposure compensation tells that system to aim brighter or darker than its original result.
- +1 EV: one stop brighter than the meter's baseline.
- -1 EV: one stop darker.
- +0.3 or +1/3 EV: one-third stop brighter.
- -0.7 or -2/3 EV: two-thirds stop darker.
The control does not add an effect after capture. It changes capture settings—aperture, shutter speed, ISO, or a combination—according to the active mode.
Why a camera meter can be “wrong”
A reflected-light meter sees the brightness returning from the scene. It does not know what the objects are. A frame filled with white snow reflects a great deal of light; a frame filled with black fabric reflects little. Left alone, the meter may pull both toward a middle tone.
This can make snow gray and too dark, while a black subject becomes gray and too bright. The meter has not malfunctioned. It lacks the photographer's knowledge of the subject.
Modern multi-zone meters use scene recognition and are more sophisticated than a simple average, but they still cannot read your intent. Backlighting, spotlights, reflective surfaces, tiny bright subjects, and unusual framing can all require a deliberate correction.
When to use positive compensation
Dial toward + when the metered photograph is darker than the result you want. Common situations include:
- snow, white sand, pale walls, or a white product filling the frame;
- a face strongly backlit by a window or sky;
- bright, airy high-key photographs;
- a small subject surrounded by very bright light when you want subject detail; and
- a scene whose important midtones are visibly too dark.
Start around +0.7 or +1 EV for a bright scene, then check the preview, histogram, and highlight warning. The required value depends on metering mode, composition, subject reflectance, and camera processing.
When to use negative compensation
Dial toward - when the automatic result is brighter than intended. Common situations include:
- black clothing, dark products, or a dark stage filling the frame;
- a concert performer under a spotlight;
- a night scene that the camera tries to turn into daytime;
- a silhouette that should remain dark;
- bright signs, flames, or reflections that need highlight protection; and
- a deliberately moody low-key image.
Negative compensation does not automatically preserve every highlight. If the scene exceeds the camera's dynamic range, you must decide which tones matter, change the lighting, bracket exposures, or accept clipping.
What changes in each camera mode
Program mode
The camera may adjust shutter speed, aperture, or ISO to reach the compensated target. Program logic differs between models. Watch all displayed values.
Aperture Priority
You fix aperture, so the camera normally changes shutter speed. With Auto ISO, ISO may also change according to its limits. Adding +1 EV could change 1/250 to 1/125 second, which raises the risk of motion blur.
Shutter Priority
You fix shutter speed, so the camera normally changes aperture. With Auto ISO, ISO may take over when the lens reaches its aperture limit. Adding compensation can reduce depth of field if the lens opens wider.
Manual mode
With manual aperture, shutter, and ISO, exposure compensation often has no effect on captured brightness because the camera controls no exposure variable. It may simply move the meter reference.
With Manual mode and Auto ISO, compensation can tell the camera to select a higher or lower ISO. Not every camera supports this behavior.
Compensation changes the camera-controlled variable. Before turning the dial, identify whether that will be shutter speed, aperture, ISO, or more than one.
Exposure compensation is measured in stops
EV adjustments use the same stop relationships as aperture, shutter speed, and ISO. If Aperture Priority gives 1/500 second at f/4 and ISO 200:
- +1 EV may change shutter speed to 1/250;
- -1 EV may change it to 1/1000; and
- +2 EV may change it to 1/125.
The exact response changes if Auto ISO or safety-shift functions are active. Review the exposure triangle if these equivalent changes are unfamiliar.
Metering mode changes the starting point
Exposure compensation biases the meter's answer, so the metering pattern matters:
- Evaluative, matrix, or multi: analyzes much of the frame and may use scene recognition.
- Center-weighted: emphasizes the central region while still considering the rest.
- Spot: meters a small area, often around the selected point or frame center.
A compensation value that works with spot metering on skin may not work with matrix metering on the whole scene. Treat the number as a correction for the current composition and meter, not a permanent recipe.
Use the histogram and highlight warning
The rear-screen image can look brighter or darker because of display brightness, ambient light, or picture settings. A histogram gives an additional view of tonal distribution, while a highlight warning shows areas the processed preview considers clipped.
Do not try to force every histogram into the middle. A snowy frame should naturally contain many bright pixels, and a night frame many dark pixels. The important question is whether valuable detail is being lost at an edge.
Our beginner camera guide explains how reviewing one purposeful correction is more useful than repeatedly changing several settings.
Exposure compensation and RAW files
Compensation changes exposure settings before capture, so it affects RAW data whenever aperture or shutter time changes. If only ISO changes, the effect depends on camera gain and processing, but highlight placement and metering still change.
The histogram and preview are generally based on a processed image rather than a direct map of RAW channel limits. A highlight may blink even when some RAW recovery remains—or appear safe while one color channel is near clipping. Leave margin in critical work and test the camera's behavior.
Exposure compensation versus flash compensation
Ambient exposure compensation and flash exposure compensation are related but separate controls. In TTL flash photography:
- regular compensation may change the ambient background, flash output, or both depending on camera system;
- flash compensation specifically tells the automatic flash to emit more or less light.
To make a flash-lit face brighter without changing the background, adjust flash compensation. To change the ambient background while holding flash subject brightness, adjust the ambient exposure variables separately. Consult the camera and flash manuals because systems differ.
Exposure lock versus compensation
Autoexposure lock, often AE-L or AEL, holds a meter reading while you recompose. Exposure compensation shifts the target brighter or darker. You can use both: meter an area, lock the reading, then bias it if that tone should not be rendered near the meter's assumed value.
A quick field workflow
- Take or preview the metered exposure.
- Identify the important tone: face, white fabric, cloud, stage light, or shadow detail.
- Decide whether it is too bright or too dark for your intent.
- Dial + or - in one-third- or two-thirds-stop steps.
- Watch which exposure setting changes and make sure it remains safe.
- Check histogram, highlights, focus, and motion.
- Return compensation to zero when the lighting reason ends.
Common compensation mistakes
- Turning + when you want less exposure. Plus is brighter; minus is darker.
- Leaving a previous value active. Check the scale at the start of a new scene.
- Ignoring the changed shutter speed. Positive compensation in A mode can introduce blur.
- Using compensation to solve impossible contrast. It moves the tonal range; it does not expand sensor capacity.
- Trusting the LCD alone. Display brightness can mislead in sun or darkness.
- Confusing ambient and flash compensation. Choose the control for the light source you need to change.
Sources and further reading
The basic behavior and positive/negative examples were checked against Sony's official Exposure and Exposure Compensation guide. Mode interactions were cross-checked with Sony's Manual Exposure documentation and Nikon camera documentation describing compensation as an adjustment from the value suggested by the meter. Exact limits and Auto ISO behavior vary by model.
Frequently Asked Questions
-
It tells the automatic exposure system to produce a result one stop brighter than its baseline. Depending on the mode, the camera may use a slower shutter, wider aperture, higher Auto ISO, or a combination.
-
Use negative compensation when the meter makes a dark scene too bright, when a silhouette should remain dark, or when important highlights need more protection. Check the histogram rather than relying on a fixed recipe.
-
With manual aperture, shutter, and ISO, it often changes only the meter reference. With Auto ISO enabled, many cameras use compensation to choose a brighter or darker ISO target. Check the exact camera manual.
-
No. Compensation is an instruction to automatic exposure. ISO is one specific camera setting. Compensation may change ISO, shutter speed, aperture, or more than one depending on mode.
-
A reflected-light meter may render a frame dominated by bright snow closer to a middle tone, making it gray. Positive compensation tells the camera that the scene should remain brighter, provided important highlights do not clip.