How to Use a Camera: A Beginner's Guide to Better Photos
Set up your camera, understand its essential controls, focus reliably, and follow a simple shooting routine that works with DSLR and mirrorless cameras.
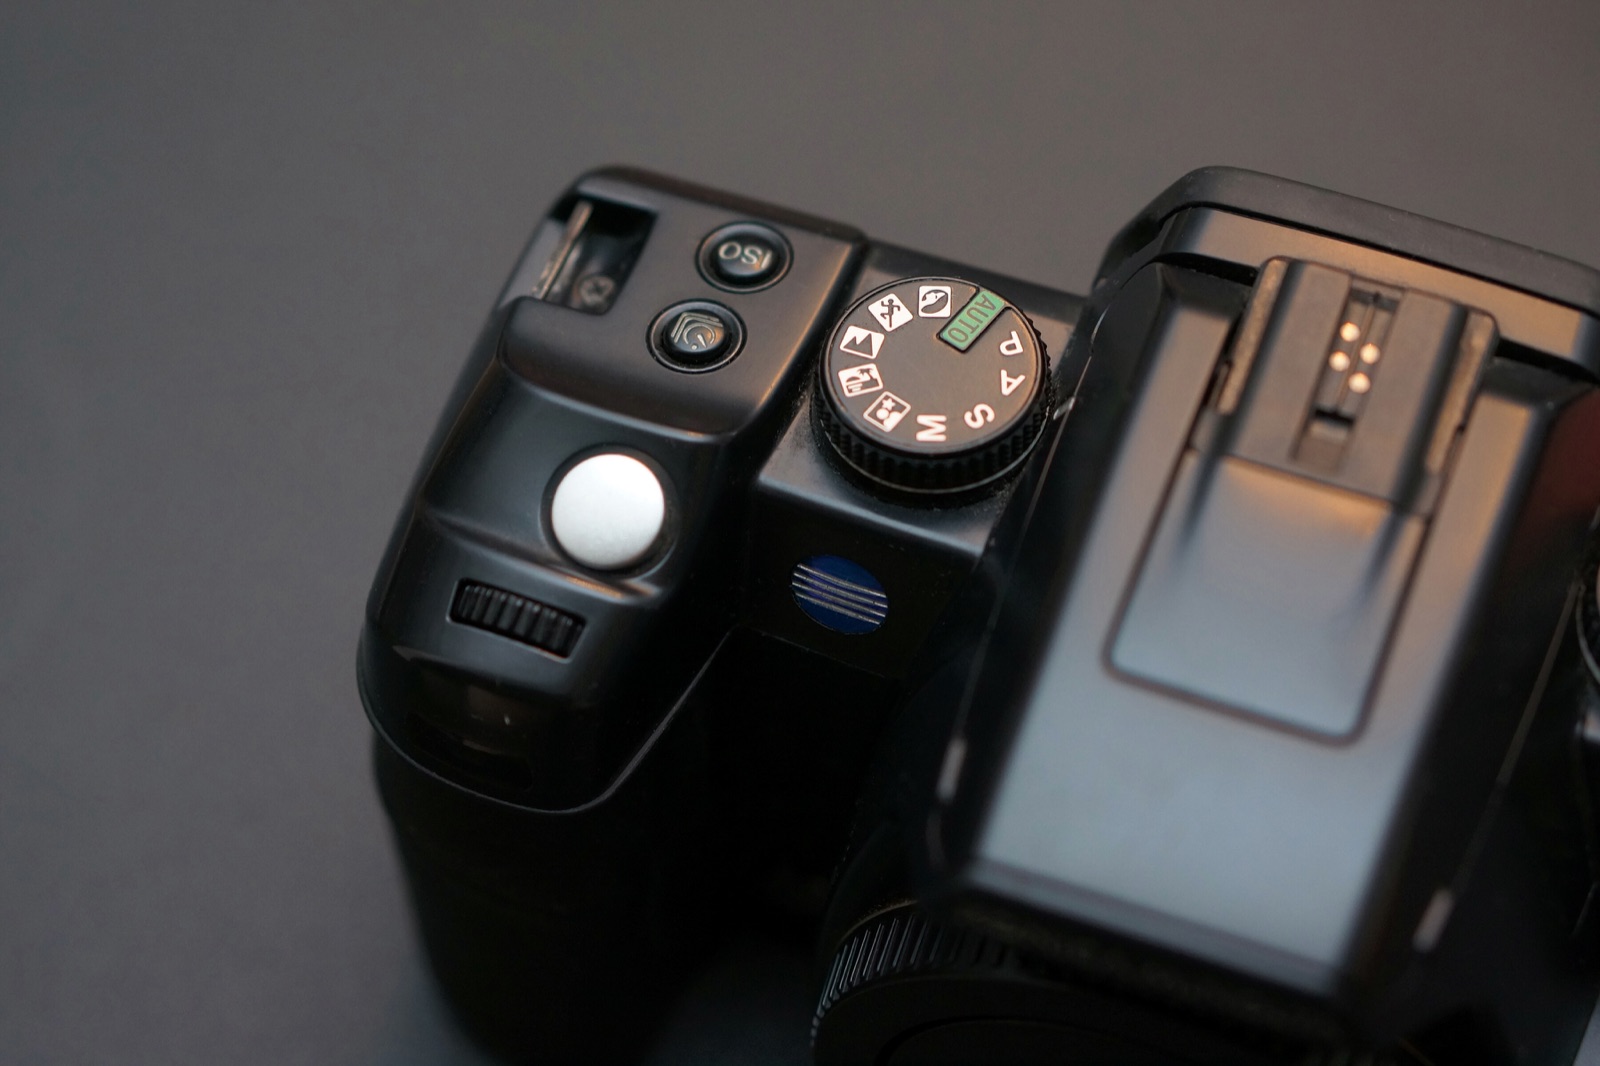
This guide gives you a practical route from opening the camera bag to making a sharp, intentional photograph. Button names differ between Canon, Nikon, Sony, Fujifilm, Panasonic, OM System, and other brands, so keep your camera's manual nearby when a menu name does not match exactly.
1. Prepare the camera before you shoot
Charge the battery and insert a memory card
Fully charge the battery, then insert it in the direction shown beside the compartment. Insert a compatible memory card while the camera is switched off. If the card already contains photographs, copy them somewhere safe before doing anything else.
Use the camera's own Format card command for a new or safely backed-up card. Formatting prepares its file system for that camera, but it also erases the card's existing contents. Never format a card merely to clear an unfamiliar warning without first checking what is stored on it.
Attach the lens without touching the glass
Remove the rear lens cap and camera body cap. Align the matching dots or marks on the lens and mount, insert the lens gently, and rotate it until it clicks. Do not force it. Keep the camera opening pointed downward when possible so less dust can settle inside.
If the lens has an AF/MF switch, set it to AF. If it has an image-stabilization switch, turn stabilization on for handheld shooting. Turn it off only when your camera or lens manual recommends doing so on a tripod.
Set the basic preferences once
- Set the date, time, and time zone so files sort correctly.
- Choose your preferred language.
- Set image quality to high-quality JPEG, or RAW+JPEG if you intend to edit RAW files.
- Leave white balance on Auto for now.
- Turn on the viewfinder grid and highlight warning if your camera offers them.
2. Learn the controls that matter first
You do not need to memorize every button. Find these six controls on your camera:
- Power switch: turns the camera on and off.
- Shutter button: a half-press usually wakes metering and autofocus; a full press takes the photograph.
- Mode dial or mode menu: selects Auto, P, A/Av, S/Tv, M, and scene modes.
- Command dial: changes aperture, shutter speed, or another active setting.
- Focus-point control: moves the autofocus area around the frame.
- Playback and delete buttons: review images and remove obvious mistakes.
Also locate the exposure-compensation control, often marked +/−. It is the fastest way to tell an automatic or semi-automatic mode to make the next photo brighter or darker.
3. Hold the camera steadily
Grip the camera with your right hand and support the lens from underneath with your left. Keep your elbows relaxed and reasonably close to your body. Stand with your feet slightly apart, exhale gently, and squeeze the shutter rather than jabbing it.
Use the viewfinder when practical. Bringing the camera to your face creates a third point of contact and is often steadier than holding the rear screen at arm's length. When using the screen, tuck your elbows in or brace the camera against a stable object.
Good technique reduces camera shake, but it cannot freeze a moving person or animal. Subject motion requires a sufficiently fast shutter speed.
4. Choose a shooting mode without fearing the dial
Auto: useful while you learn the physical controls
Full Auto lets the camera choose most settings. Use it when you need to concentrate on holding, framing, zooming, and pressing the shutter smoothly. Its limitation is that the camera may choose a flash, focus area, shutter speed, or depth of field you did not intend.
Program mode: the easiest flexible starting point
P mode chooses aperture and shutter speed but usually lets you control ISO, exposure compensation, focus, white balance, and drive mode. It is a good everyday setting while you learn what the camera is doing.
Aperture Priority: control background blur
A or Av mode lets you choose the aperture while the camera selects a shutter speed. Use a lower f-number for more background separation, or a higher f-number when more of the scene needs to look sharp. Always watch the resulting shutter speed; in dim light it may become too slow for handheld work.
Shutter Priority: control motion
S or Tv mode lets you choose shutter speed while the camera selects an aperture. A fast value such as 1/1000 second can freeze sports or birds; a slower value can show deliberate motion blur. If the aperture display flashes, the lens may not be able to admit enough or little enough light for the setting you chose.
Manual mode: use it when consistency matters
M mode gives you direct control over aperture and shutter speed. It is useful when the light is stable and you want a sequence to remain consistent, such as studio photos, panoramas, or tripod scenes. Manual is not a badge of skill, and professional photographers regularly use automatic and priority modes when they suit the subject.
Want to understand what the camera balances in P, A, S, and M modes? Read our exposure triangle guide for a plain-English explanation of aperture, shutter speed, ISO, and stops.
5. Set autofocus for the subject
Still subject: single autofocus
Choose AF-S, One-Shot AF, or the equivalent single-focus mode. Place one focus point on the subject, half-press the shutter, and wait for focus confirmation. The camera locks focus while you hold the half-press.
Moving subject: continuous autofocus
Choose AF-C, AI Servo, or the equivalent continuous mode. Keep the active focus area over the subject while holding the shutter halfway or holding the AF-ON button. The camera continues adjusting as subject distance changes.
Choose the focus area deliberately
Wide-area or automatic subject detection is convenient, especially when eye detection works well. If the camera focuses on the background or the wrong face, switch to a smaller zone or single point and place it yourself. For portraits, focus on the nearest visible eye unless another detail is intentionally more important.
Focus and composition are separate decisions. First make sure the important detail is sharp; then scan the frame edges for cut-off hands, poles behind heads, bright distractions, and unwanted empty space.
6. Use beginner-friendly settings
Auto ISO
Auto ISO lets the camera raise or lower ISO as light changes. If your camera offers limits, set a reasonable maximum and a minimum shutter speed suited to the subject. Do not keep ISO extremely low if doing so causes motion blur. A sharp high-ISO image is often better than a clean but blurred one.
White balance
Auto White Balance is dependable for general use. Change it only when colors look wrong or when a series needs consistent color. Daylight, Cloudy, Shade, Tungsten, and custom Kelvin settings describe the light source; they do not make a bad exposure correct.
Drive mode
Use single-frame drive for still subjects. Use continuous drive for brief action sequences, but avoid holding the shutter down without purpose. The two-second self-timer is useful on a tripod because it lets vibration settle after you touch the camera.
JPEG or RAW
JPEG files are ready to share and take less storage. RAW files retain more editing flexibility but require processing. RAW+JPEG is a practical learning option if storage allows: use the JPEG immediately and keep the RAW file for later practice.
7. Follow the same shooting routine every time
- Notice the light. Is it bright, dim, hard, soft, front-lit, or backlit?
- Decide what matters. Is the photograph about an expression, movement, depth, color, or shape?
- Choose a mode. Use Aperture Priority for depth of field, Shutter Priority for motion, or Program for a responsive general setting.
- Frame the subject. Move your feet before reaching for the zoom. Check the background and edges.
- Place the focus area. Put it on the detail that must be sharp.
- Half-press and check. Confirm focus and glance at shutter speed, aperture, and ISO.
- Take the photo smoothly. Hold still through the exposure rather than dropping the camera immediately.
- Review with a purpose. Check sharpness and important highlights, make one correction, and shoot again.
This routine turns the camera from a wall of settings into a short sequence of decisions.
8. Practice with five simple exercises
Exercise 1: move the focus point
Arrange three objects at different distances. Use a single focus point and make one photo focused on each object. Review the images at high magnification.
Exercise 2: compare apertures
In Aperture Priority, photograph one subject at your widest aperture, at f/5.6, and at f/11 without changing position. Compare background detail and the shutter speeds the camera selected.
Exercise 3: freeze and blur motion
In Shutter Priority, photograph a walking person, running water, or a spinning fan at 1/30, 1/250, and 1/1000 second. Notice that there is no universally correct shutter speed—each one describes motion differently.
Exercise 4: use exposure compensation
Photograph the same scene at −1, 0, and +1 exposure compensation. Learn which direction makes the image brighter before you encounter a fast-changing subject.
Exercise 5: make ten intentional frames
Choose one ordinary subject and take only ten photographs. Change position, height, distance, orientation, and timing before changing equipment. This trains observation instead of button pressing.
9. Avoid these common beginner mistakes
- Buying more gear before learning the current camera. A different body will not fix missed focus, poor light, or an unnoticed background.
- Using Manual mode for everything. Choose the simplest mode that gives you the control the photograph needs.
- Letting the camera choose the wrong subject. Move the focus point or use subject detection deliberately.
- Checking only brightness. Zoom into playback to inspect the important detail for sharpness.
- Deleting in-camera too aggressively. A frame that looks soft on a small screen may be usable; protect your time and battery while shooting.
- Keeping every image on one card. Copy files to at least one additional location after the session.
10. Finish the session safely
Switch the camera off before removing the lens, card, or battery. Replace the front and rear lens caps, avoid leaving the sensor opening exposed, and store the camera somewhere dry. Copy the photographs to a computer or other storage, verify that the files open, and create a second copy before formatting the card for reuse.
Finally, review a small selection and read the recorded settings. Ask why the sharp frames worked and why the failed frames failed. That habit turns every shoot into a lesson.
Sources and further reading
This guide was checked against manufacturer learning resources, including Sony's Basic Knowledge series and Drive Mode guide, Nikon's Auto ISO guide, and Canon documentation describing half-press focus lock and common shooting modes. Menu names and available features vary, so the manual for your exact camera remains the final reference.
Frequently Asked Questions
-
Start with Program mode for general photography or Aperture Priority when you want to control background blur and depth of field. Full Auto is also useful while learning the camera's physical controls. You do not need to begin in Manual mode.
-
A practical starting point is Program or Aperture Priority, Auto ISO with a sensible maximum, Auto White Balance, single autofocus for still subjects, and continuous autofocus for moving subjects. Adjust one setting when the scene gives you a specific reason.
-
The usual causes are focus on the wrong subject, a shutter speed that is too slow, subject movement, camera shake, or insufficient depth of field. Check where the focus point landed and read the shutter speed before changing equipment.
-
JPEG is simplest because files are ready to view and share. RAW offers more editing flexibility. RAW+JPEG is useful for learning if you have enough card and computer storage, but remember that RAW files require compatible processing software.
-
Practice one control at a time on the same subject. Compare several apertures, shutter speeds, focus points, or exposure-compensation values side by side, then read the recorded settings. Controlled comparison teaches cause and effect quickly.