ISO Settings Explained: A Practical Beginner's Guide
Learn what digital camera ISO actually changes, why high-ISO photos show noise, how ISO stops work, and when Auto ISO is the smartest setting.
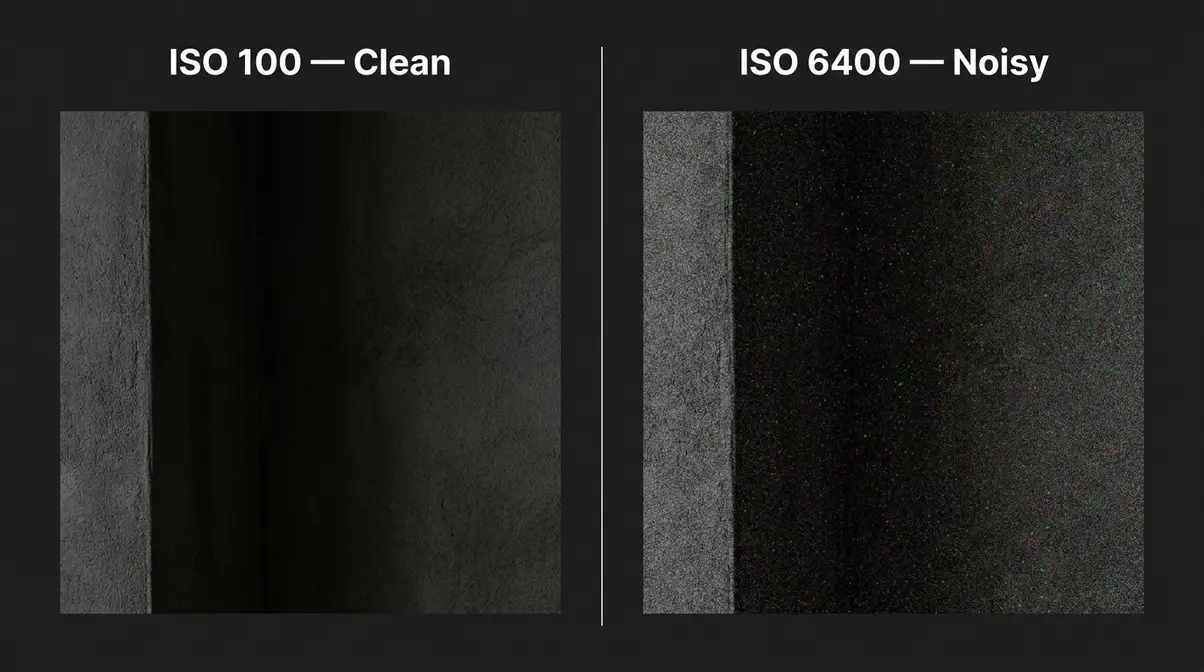
ISO is often described as sensor sensitivity. That shorthand is convenient, and camera standards use the language of sensitivity, but it can hide what a digital camera is doing. The silicon sensor does not physically transform into a more light-sensitive sensor each time you change the setting.
What ISO changes in a digital camera
During an exposure, light produces an electrical signal in the sensor. The camera reads that signal, applies analog and digital processing, and turns it into image values. The ISO setting tells the camera how that captured signal should be amplified and mapped to the finished brightness.
Sony's official beginner documentation describes digital ISO as an indicator of how much the light-derived signal is amplified inside the camera. At ISO 200, the camera produces approximately one stop more recorded brightness than at ISO 100 when aperture, shutter speed, and scene lighting are identical.
Crucially, changing ISO by itself does not increase the number of photons collected. Aperture controls the size of the lens opening, and shutter speed controls how long light is collected. ISO influences what the camera does with the resulting signal.
The full-stop ISO sequence
A common full-stop sequence is:
ISO 100 → 200 → 400 → 800 → 1600 → 3200 → 6400 → 12,800
Each step to the right is one stop higher and doubles the recorded brightness for the same aperture, shutter speed, and light. Each step to the left is one stop lower and halves it.
- ISO 400 is one stop above ISO 200.
- ISO 1600 is two stops above ISO 400.
- ISO 100 is three stops below ISO 800.
Most cameras also offer one-third-stop values such as ISO 125, 160, 250, 320, and 500. Three one-third-stop adjustments equal one full stop.
How ISO balances shutter speed and aperture
Imagine you make an acceptable exposure at 1/125 second, f/4, and ISO 400. A moving subject is blurred, so you change to 1/500 second. That shutter speed is two stops faster and collects one-quarter as much light.
If you need to keep f/4, raising ISO 400 to ISO 1600 restores two stops of recorded brightness. The faster shutter freezes more motion, while the higher ISO makes the limited captured signal more visible.
You could instead open the aperture by two stops if the lens allows it, but depth of field would become shallower. Every choice protects one part of the photograph by trading something else. See our shutter-speed stops guide and f-stop guide for the matching sequences.
Why high-ISO photos show more noise
Image noise is random variation that appears as grain-like brightness changes, colored speckles, bands, or loss of fine detail. Several sources contribute, including the statistical nature of arriving light, sensor electronics, heat, readout, and image processing.
The largest practical lesson is that noisy high-ISO photographs are usually made in low light or with short exposure times. The sensor receives fewer photons, so the desired signal is weaker relative to random photon shot noise. Amplification makes both the signal and existing variation visible.
Therefore, “high ISO causes all the noise” is incomplete. If you photograph the same scene twice but give one exposure much less actual light, that low-light capture starts with a weaker signal. Darkening it with low ISO and brightening it aggressively later does not restore the photons that were never collected.
Raising ISO can sometimes produce a cleaner result than severely underexposing at low ISO and lifting the shadows in editing, especially when the camera's read noise is lower at the higher gain setting. The behavior varies by sensor and ISO range.
Capture as much useful light as the scene allows without sacrificing the shutter speed, depth of field, or important highlights the photograph requires. Then use ISO to place that signal at a practical recorded brightness.
Noise and grain are not the same
Film grain is the visible structure of the light-sensitive material that forms a film image. Digital noise comes from statistical and electronic variation in capture and processing. They can look superficially similar, but they are different phenomena.
Editing software may add a film-grain effect deliberately because its texture can be visually pleasing. Digital color noise and fixed-pattern banding are more often distracting, although luminance noise can sometimes feel natural at a modest level.
What is base ISO?
Base ISO is the camera's fundamental low-gain setting, commonly ISO 64, 100, or 200 depending on the model and recording mode. It usually provides the broadest dynamic range and lowest visible noise when you can give the sensor enough light without clipping highlights.
Do not assume the lowest number shown is always the base setting. A value marked L, Low, or Extended may be produced by overexposing at a base gain and digitally reducing brightness. It can reduce highlight headroom without adding the same benefit as a true lower native setting.
Video log profiles may require a higher minimum or base ISO because their tone curve and gain strategy are designed to retain a particular dynamic-range distribution. Use the manual for the exact camera, picture profile, and recording mode.
Native, extended, and dual-base ISO
Native ISO range refers to the settings the manufacturer treats as normal operating values. Extended ISO settings may use digital scaling beyond that range and can have more limited image quality or highlight latitude.
Some cameras use a sensor with two analog gain paths, often marketed as dual native ISO or dual base ISO. At a particular higher setting, the camera changes readout gain and can reduce read noise compared with the settings immediately below it. It does not make dim light equivalent to bright light, and the exact transition depends on recording mode.
These distinctions matter most in demanding RAW or video work. Beginners can make excellent choices by watching exposure, shutter speed, aperture, and actual results rather than memorizing sensor engineering.
ISO and dynamic range
Dynamic range is the span between the brightest usable highlight and darkest usable detail in a capture. At base ISO, many cameras can hold their widest range when exposed appropriately.
As ISO rises, the highlight level that maps to white generally requires less captured light. This reduces highlight headroom even if shadow read noise improves. Bright signs, lamps, clouds, white clothing, and reflections can clip sooner.
Check the histogram and highlight warning instead of assuming a high-ISO image is safe because the preview looks dark. A preview is a processed interpretation, while clipped RAW channels may not be obvious from overall brightness alone.
Low ISO: when it helps
Use a low or base ISO when you can collect sufficient light without unwanted movement or depth-of-field compromises:
- landscapes on a tripod;
- studio products with controlled lighting;
- architecture and interiors with static subjects;
- daylight portraits when the desired shutter speed and aperture permit it;
- long exposures where time is intentionally extended; and
- scenes requiring maximum highlight and shadow flexibility.
Low ISO does not guarantee a clean image. If the exposure is extremely dark and you lift it later, shadow noise can still become obvious. Actual light remains the foundation.
High ISO: when it is the better choice
Raise ISO when keeping it low would damage the photograph in a more important way:
- freeze an athlete, animal, or child with a fast shutter;
- prevent handheld camera shake in dim light;
- maintain enough depth of field for an event or group;
- photograph a concert or ceremony where flash is prohibited;
- record stars before their apparent movement becomes a trail; or
- work quickly as light changes.
A sharp ISO 6400 photograph is normally more useful than a clean-looking ISO 100 frame blurred by unwanted movement. Noise-reduction software can reduce noise; it cannot reconstruct a face smeared across several pixels.
How high is too high?
There is no universal maximum. A usable setting depends on:
- camera and sensor generation;
- how much light reached the sensor;
- RAW processing or in-camera JPEG settings;
- subject detail and shadow depth;
- print or display size;
- viewer distance; and
- whether the moment matters more than technical cleanliness.
Test your own camera. Photograph a detailed, moderately dark scene at every full-stop ISO while keeping final brightness comparable by changing shutter speed. Process the files as you normally would, then compare them at the size you publish or print—not only at 100% magnification.
Choose an Auto ISO ceiling based on that real output. A value that looks rough on a large monitor may look completely acceptable in a web image or small print.
How Auto ISO works
Auto ISO lets the camera raise and lower ISO as light changes. Many cameras allow you to set:
- a minimum ISO;
- a maximum ISO; and
- a minimum shutter speed or an automatic rule linked to focal length.
In Aperture Priority, you choose depth of field. The camera lowers shutter speed as light falls until it reaches the minimum you allowed, then raises ISO. In Shutter Priority, the camera adjusts aperture and may raise ISO when the lens reaches its widest opening. In Manual mode with Auto ISO, you lock aperture and shutter speed while the camera changes ISO for brightness.
Manual exposure with Auto ISO is especially useful for action in changing light: choose the shutter speed needed to stop the subject and the aperture needed for depth, then let ISO follow clouds, shade, or changing backgrounds.
Exposure compensation can often shift the Auto ISO result brighter or darker in this setup, but model behavior varies. Confirm with the camera manual.
Choosing an Auto ISO minimum shutter speed
Set the minimum for the subject, not only for your hands. A stabilized camera may hold a stationary wall sharply at 1/15 second, but a person can move during that time.
- 1/60–1/125: quiet people and everyday scenes.
- 1/250: active events and moderate movement.
- 1/500–1/1000: sports, wildlife, running children, and quick gestures.
These are starting points. Direction, distance, focal length, output size, and the movement you want to show all change the requirement.
ISO in RAW and JPEG files
A JPEG receives camera-selected noise reduction, sharpening, tone mapping, color, and compression. Strong high-ISO noise reduction can smooth grain but also remove hair, feathers, fabric, and other fine texture.
A RAW file retains more processing flexibility, although it is not untouched sensor data in every respect. You can balance luminance noise, color noise, sharpening, and detail later. The camera's ISO setting still affects metering, preview, analog gain on many cameras, and highlight placement.
Do not judge RAW noise from an unconfigured default preview alone. Compare finished files using the same workflow.
Does ISO change exposure?
Photographers use the word exposure in two ways. Physically, exposure at the sensor is governed by scene light, aperture, and time. In everyday camera use, people also say ISO is part of exposure because it changes recorded brightness and determines which aperture and shutter combinations create the expected output.
Both usages can be understood as long as the distinction is clear: raising ISO can brighten the image data, but it cannot make the sensor collect light that aperture and shutter time did not provide.
A practical ISO decision order
- Choose aperture for the required depth of field and lens rendering.
- Choose shutter speed for subject motion and camera stability.
- Add light or improve support when practical.
- Raise ISO until the important tones are recorded at a useful brightness without sacrificing critical highlights.
- Review focus, motion, histogram, and highlight warnings—not noise alone.
This priority protects the content of the photograph before optimizing its texture. Our beginner camera guide provides a repeatable routine for applying these settings in the field.
Common ISO mistakes
- Keeping ISO 100 while the subject blurs. Raise ISO when it protects a necessary shutter speed.
- Using the highest ISO because the scene is dark. Increase only as far as needed after choosing aperture and shutter.
- Underexposing to “protect quality.” A severely lifted low-ISO file may be noisier than an appropriately exposed higher-ISO file.
- Assuming noise comes only from ISO. Insufficient captured light is a major cause.
- Setting Auto ISO without limits. Choose a ceiling and minimum shutter suited to the subject.
- Comparing cameras at different output sizes. Normalize the final size and processing before judging high-ISO quality.
Sources and further reading
The amplification description and ISO examples were checked against Sony's official ISO Sensitivity guide and its Base ISO reference. Auto ISO behavior was cross-checked with Nikon's Understanding Auto ISO guide, and practical high-ISO tradeoffs were reviewed against Nikon's Understanding ISO Sensitivity.
Frequently Asked Questions
-
Use Auto ISO with a sensible maximum and minimum shutter speed, or begin at base ISO in bright light and raise it when necessary to protect shutter speed and depth of field. There is no single correct value for every scene.
-
Higher ISO makes noise more visible, but high-ISO photographs are also usually made with less captured light. That weak light signal has more random variation relative to useful detail. Amplification and camera processing then affect how the noise appears.
-
ISO 800 is three stops above ISO 100, but whether it is “high” depends on the camera, lighting, exposure, processing, and output size. On many modern cameras it is a routine setting rather than an extreme one.
-
Use the lowest ISO that still allows the aperture and shutter speed the photograph requires. Keeping ISO low is counterproductive if it causes unwanted motion blur, camera shake, or insufficient depth of field.
-
ISO 200 is one stop above ISO 100. With the same aperture, shutter speed, and light, it produces approximately twice the recorded brightness. Alternatively, it lets you use a shutter speed twice as fast or an aperture one stop narrower for similar output brightness.