How to Shoot Photos in Strong Sunlight
Control hard shadows and bright highlights in midday sun with better subject placement, exposure, shade, diffusion, reflectors, and restrained fill flash.
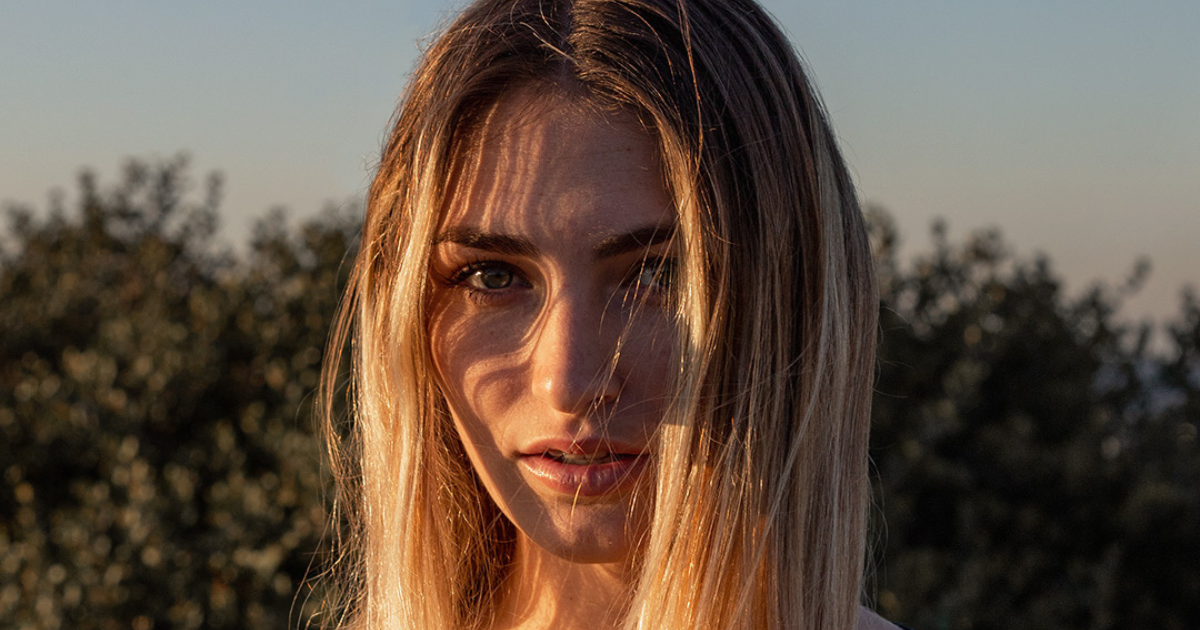
Why strong sun looks difficult
A clear midday sun is a small apparent light source positioned high in the sky. It produces sharp shadow edges, bright reflective highlights, and dark areas beneath brows, noses, chins, leaves, and architectural overhangs. The brightness range may exceed what the camera can record in one exposure.
The light is also difficult to judge on the rear screen because ambient glare makes the display look darker and flatter. Exposure data is more trustworthy than the preview.
Choose the photograph before choosing the fix
Ask what matters most:
- Do you need a face with gentle tonal transitions?
- Do you want the sunlit background and subject both detailed?
- Would a silhouette communicate the scene better?
- Are the hard shadows themselves the subject?
- Can you move, wait, or reframe?
A portrait, white building, street shadow, and sparkling ocean require different priorities. Trying to make every sunny scene look like overcast light often removes its strongest quality.
Set exposure for the important highlight
Bright sun encourages low ISO and fast shutter speeds, but there is no fixed setting. Start at the camera's base ISO when shutter speed and aperture allow it. Choose an aperture for the required depth of field, then set or monitor shutter speed.
Use the histogram and highlight alert. A small clipped sun or specular sparkle may be unavoidable; clipped skin, a white dress, or textured cloud may not be. In an automatic or semiautomatic mode, apply negative exposure compensation if the camera makes important highlights too bright.
RAW capture provides more adjustment latitude than JPEG, but it cannot restore a channel that is completely clipped.
Backlight a portrait
Place the subject between the camera and sun, then move slightly so the light comes from behind one shoulder. This keeps direct sun out of the eyes and creates separation around hair and clothing.
Expose for the face if the background can become bright, or expose for the background and add fill if both must retain detail. Shield the lens with a hood, hand, flag, or nearby object without placing anything in the frame. Change your angle by a few degrees to control flare.
Autofocus may struggle when the sun shines into the lens. Shade the lens, focus on a high-contrast facial feature, and confirm the eye rather than assuming the green box means perfect focus.
Move into open shade
Open shade blocks direct sunlight while allowing a broad view of the sky. The edge of a building, a covered walkway, or the open side of a tree line can create soft, even light.
Avoid deep caves of shade with bright backgrounds. Move the subject near the shade's edge, turn the face toward the open sky, and choose a background that is also shaded or naturally darker. Watch for green color reflected from grass and warm color from walls.
The broader outdoor photography lighting guide explains how shade, cloud, golden hour, and blue hour differ.
Use a diffuser for a small subject
A translucent diffuser placed between the sun and subject enlarges the effective source and softens shadow transitions. It is practical for a head-and-shoulders portrait, flowers, food, and products.
Keep the diffuser secure and close enough to cover the subject. Wind turns large panels into sails, so use an assistant, stable support, and a smaller surface when conditions are unsafe. A diffuser reduces light level, so recheck shutter speed and exposure.
Use a reflector to lift shadows
A reflector redirects existing light; it does not soften the sun that strikes the subject directly. A white surface produces restrained fill, while silver is stronger and more specular.
Bring it close, angle it by watching the subject rather than the reflector, and keep it below squinting brightness. For a face, lift only enough shadow to retain shape. A pale wall, pavement, sand, or vehicle can provide natural bounce without extra gear.
Add fill flash
Fill flash can brighten a backlit subject or open eye shadows while the ambient exposure controls the background. Start with TTL flash and negative flash exposure compensation, or low manual power, so the result does not look like a night scene pasted onto daylight.
At or below normal flash sync speed, set the ambient exposure first and then add flash. High-speed sync permits faster shutter speeds and wide apertures, but greatly reduces flash range. Move the light closer and understand that a small speedlight will not evenly overpower the sun across a large group.
Check for hard double shadows. On-camera fill should remain subtle; an off-camera source can become a deliberate new key light.
What an ND filter does—and does not do
A neutral-density filter reduces all incoming light. It helps you use a wide aperture for shallow depth of field or a slow shutter for motion blur when the scene is too bright.
It does not make sunlight softer and does not bring a bright sky and shaded face closer together. Both areas are darkened equally. Variable ND filters can show uneven polarization or a dark X pattern at strong settings, especially on wide lenses.
When a polarizer helps
A circular polarizer can reduce reflection from water, leaves, glass, paint, and skin, depending on the angle. It may deepen a blue sky most strongly around 90 degrees from the sun.
On an ultrawide lens, that effect can produce an uneven sky. A polarizer also removes light and cannot recover a clipped highlight. Rotate it while watching the actual reflection you want to control.
Make hard light the subject
Strong sun works beautifully when you stop trying to hide it:
- place a person in one clean patch of light against a dark wall;
- photograph repeating balcony, stair, or fence shadows;
- use silhouettes against bright pavement or sky;
- look for saturated primary colors;
- frame the sun partly behind an object for a starburst;
- use side light to reveal stone, bark, fabric, or sand; and
- convert a shape-driven scene to black and white.
Expose for the lit area and allow unimportant shadows to go dark. The contrast becomes the organizing element.
Strong sun for landscapes
Midday is often less revealing for broad terrain because overhead light creates short shadows. Look for subjects that benefit instead: clear water, aerial viewpoints, narrow canyons receiving a shaft of light, clouds, graphic geology, or reflections controlled with a polarizer.
Use a lens hood and keep the front element clean. Heat shimmer can soften distant subjects even with perfect focus; move closer, shoot across less heated air, or return when temperatures are lower.
Strong sun for street photography
Find a stable composition where sun and shade form a stage, then wait for a gesture to enter the bright area. Manual exposure is useful because the light on that patch remains consistent even as dark clothing or background area changes the meter.
Protect faces from disrespectful or unsafe positioning, and avoid staring through the finder while walking near traffic. The best shadow is not worth losing awareness of the street.
Dappled sunlight
Small bright patches through leaves can create random spots across a face. Move the person into complete shade, use a sufficiently large diffuser, or wait for a cloud. Trying to lift every shadow in post often leaves the bright spots clipped and the skin uneven.
For non-portrait subjects, dappled light can create rhythm. Position one bright patch on the focal point and exclude spots that compete with it.
White balance and editing
Sunlit highlights and shaded areas may have different color. Shoot RAW where practical and use a neutral reference for color-critical work. Correct the important subject first rather than forcing every part of a mixed scene to identical color.
In editing, lower highlights and raise shadows only as far as the file supports. Local adjustments are often more natural than flattening the whole image. Preserve a believable black point and the direction of light.
A fast field decision tree
- Check the highlight warning.
- Decide whether hard contrast helps the subject.
- If not, turn the subject away from direct sun or move to open shade.
- If the sun must remain, backlight or side-light the subject.
- Diffuse direct light when the subject is small enough.
- Add white bounce or gentle flash only if shadow detail is needed.
- Recheck exposure, eye focus, flare, and background.
Common mistakes
- Exposing from the rear-screen appearance. Glare makes it unreliable; use the histogram.
- Putting a person face-on to the sun. It causes squinting and unflattering shadows.
- Assuming an ND filter lowers contrast. It only lowers total exposure.
- Holding a silver reflector too close to the eyes. Keep the subject comfortable.
- Lifting every shadow in editing. Strong light needs shadow to retain its character.
- Ignoring heat and safety. Protect people and equipment, hydrate, and do not aim optical viewfinders at the sun.
Frequently Asked Questions
-
Start near base ISO, choose aperture for the intended depth of field, and use the shutter speed needed for correct exposure and motion. Check important highlights rather than relying on one fixed sunny-day recipe.
-
Move them into open shade or put the sun behind and slightly to one side. Expose deliberately, then add a nearby white reflector or gentle fill flash if facial shadows remain too dark.
-
It can permit a wider aperture or slower shutter, but it does not soften shadows or reduce the brightness difference between sun and shade.
-
Reduce exposure when necessary to protect important highlights, but do not underexpose automatically. Judge the specific subject with the histogram, highlight warning, and RAW headroom.
-
No. It works well for graphic shadows, saturated color, silhouettes, reflections, clear water, architecture, and scenes where hard contrast is part of the idea.