What Makes a Good Vlogging Camera? 12 Features That Matter
Choose a vlogging camera by framing, autofocus, audio, stabilization, recording reliability, battery, connectivity, and workflow—not specifications alone.
Start with the way you vlog
A studio tutorial, walking travel diary, product review, cooking channel, and long interview need different cameras. Before comparing models, decide:
- whether you hold the camera or place it on support;
- how far the camera sits from your face;
- whether you work indoors, outdoors, or both;
- how long a continuous take lasts;
- whether you need to show products close to the lens;
- who edits and on what device; and
- whether the camera also needs to take still photographs.
The best camera is the one that removes problems from that workflow.
1. A wide enough field of view
For self-facing handheld video, the camera is often only 20–30 inches from the presenter. A 20–24mm full-frame-equivalent view is a practical starting range; tighter lenses can show only the face and exclude the environment.
Do not judge the lens before checking crop factors. An APS-C camera with a 16mm lens gives a view near 24mm equivalent. Electronic stabilization may crop again, turning a comfortable view into a tight one. Some 4K or high-frame-rate modes also use a smaller sensor area.
Look at the recorded field of view with the exact resolution and stabilization mode you plan to use.
2. Dependable video autofocus
A solo creator cannot continuously operate the focus ring. Useful autofocus should detect a face and eye, keep tracking as the person turns or moves, and transition predictably to another subject.
For product demonstrations, test whether the camera will focus on an object held toward the lens and then return to the face without hunting. Adjustable transition speed and subject-shift sensitivity help match a gentle tutorial or fast-paced vlog.
Do not assume still-photo autofocus performance is identical in video. Test the chosen frame rate, recording format, and lens.
3. A screen you can actually see
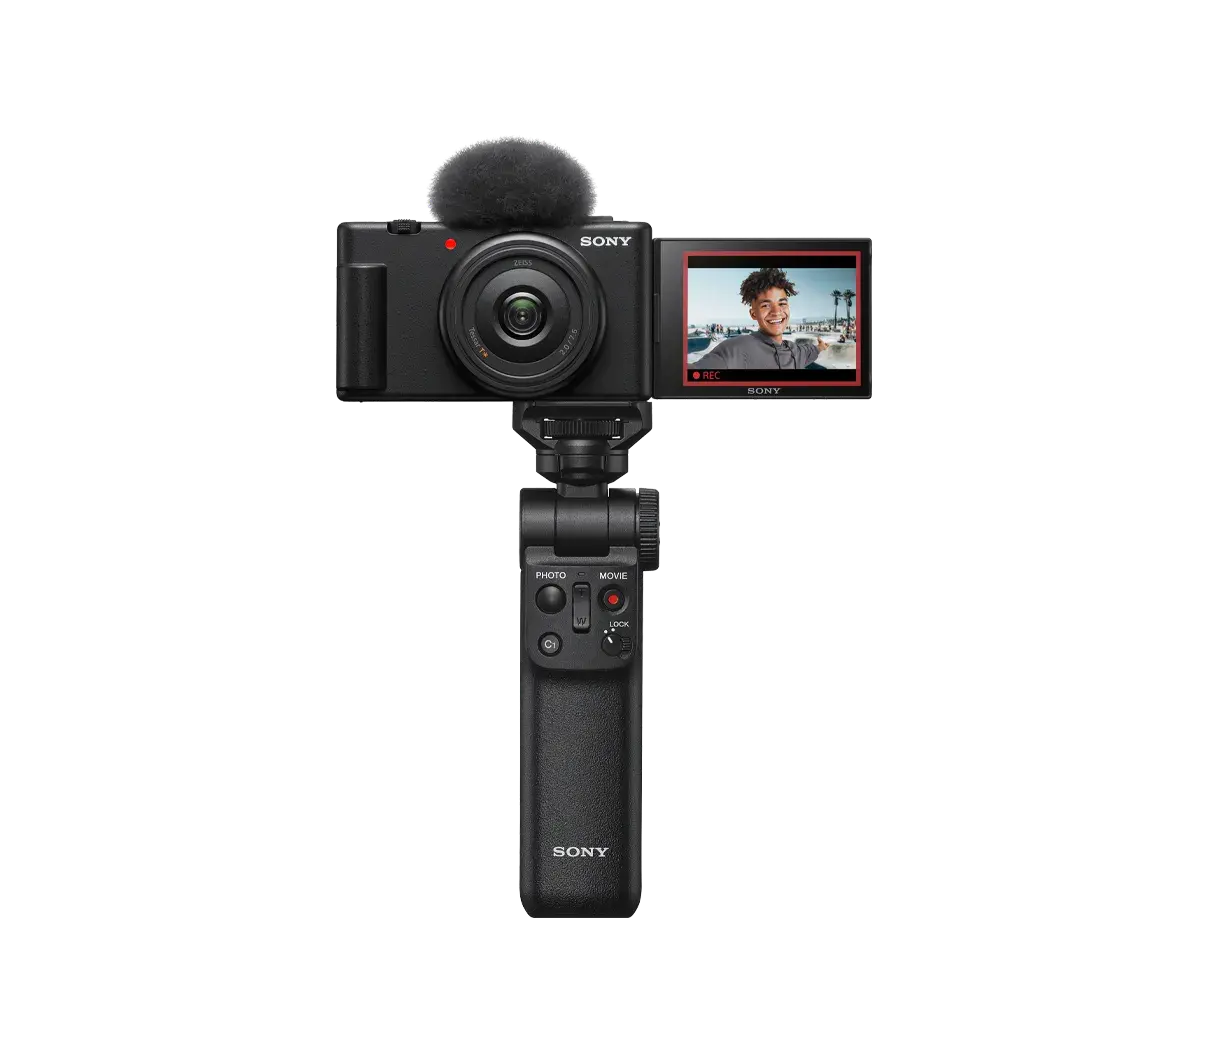
A fully articulating side-hinged screen normally provides the clearest self-facing view. A screen that tilts upward can be blocked by a top-mounted microphone, while a downward screen conflicts with a tripod or grip.
Check outdoor brightness, touch controls, recording indicators, level display, audio meters, and whether the image remains visible with sunglasses. A red frame or front tally light helps confirm that recording really started.
4. Audio that survives real locations
Viewers will tolerate modest image quality longer than muffled, distorted, or wind-blown speech. A useful camera should provide:
- a directional built-in microphone or clearly positioned stereo mics;
- a proper windscreen;
- a 3.5mm microphone input or digital accessory interface;
- visible level meters;
- manual gain where needed; and
- a headphone output for monitored productions.
A flip screen does not tell you whether the microphone is clipping. Make a test, listen through headphones, and keep the mic close enough for a strong voice-to-noise ratio.
5. Stabilization matched to movement
Optical lens stabilization and in-body sensor stabilization counter angular shake. Electronic stabilization moves a cropped window within the sensor image. Combining methods can improve walking footage, but every system has limits.
Strong electronic modes can narrow the view, warp corners near footsteps, or make deliberate pans resist and then jump. Test walking, standing, panning, and low light. A small grip, monopod, or gimbal may outperform the strongest digital setting.
6. Useful 4K, not just a 4K badge
Good 4K can capture fine detail and provide crop room for a 1080p delivery. Check:
- whether the camera reads the full width or crops;
- whether it oversamples from a higher-resolution sensor area;
- rolling-shutter skew during movement;
- frame rates and bit depth;
- recording bitrate and codec;
- autofocus availability; and
- heat or time limits.
A clean, reliable 1080p file with good audio and focus can be more valuable than unstable 4K that overheats halfway through a take.
7. Rolling-shutter control
Most cameras read a sensor row by row. A slow scan can bend vertical lines during a quick pan and make handheld wobble look gelatinous. Vlogging contains constant small movement, so readout speed matters.
Higher frame rates or cropped modes sometimes read faster, but may reduce detail or change the field. Pan at realistic speed during testing rather than relying on a specification sheet.
8. Low-light behavior
A larger sensor and bright lens can reduce noise, but shallow depth of field makes solo focus less forgiving. A small sensor with a bright, wide lens and good lighting may produce a more consistently usable result.
Evaluate skin color, autofocus, noise reduction, stabilization blur, and dynamic range under the light you actually use. Adding a compact LED often improves quality more than buying a body one format larger.
9. Battery and external power
Video drains batteries quickly because the sensor, screen, processor, and storage remain active. Check real recording time, not only a still-photo rating.
USB-C power delivery can keep a studio or livestream running, but some cameras only charge while switched off or still drain slowly during use. Confirm that the battery door, card slot, and USB port remain accessible on your tripod plate.
10. Heat and recording reliability
Small sealed bodies must dissipate substantial heat during high-resolution recording. Limits vary with room temperature, screen position, stabilization, card, and power method.
If your podcast or class lasts an hour, perform a full-duration test. Confirm whether the camera splits files cleanly, whether audio remains synchronized, and whether it recovers automatically after heat shutdown.
11. Connections and mounting
A cold shoe holds a microphone or wireless receiver. A standard tripod socket should remain centered enough to balance the camera on a grip. Micro HDMI is compact but fragile; full-size HDMI is more secure for frequent studio use.
For streaming, check clean HDMI or direct USB webcam support, output resolution, autofocus, overlays, audio routing, and whether the camera can receive power simultaneously.
12. A fast phone and editing workflow
Wireless transfer is useful for short clips, but large 4K files may be faster through a card reader or USB cable. Confirm whether the app transfers original resolution, supports background transfer, and reconnects reliably.
Also check vertical metadata, proxy recording, color profiles, audio format, and whether your editor can play the codec smoothly. A technically efficient codec may require a newer computer.
Fixed-lens compact or interchangeable-lens camera?
A compact vlogging camera is light, integrated, and simple. Its lens, microphone system, and stabilization are designed as one package. The fixed lens cannot become wider, brighter, or more specialized later.
An interchangeable-lens camera gives more creative options and can use better glass, but adds size, cost, and lens decisions. A large lens can make one-handed use uncomfortable.
A phone remains the strongest choice when immediate recording, editing, captioning, and publishing matter more than optical flexibility. Compare exact workflows, not status.
Features that are helpful but not essential
- Product showcase mode: quickly shifts focus from face to an object.
- Background-defocus button: changes aperture automatically, but may raise ISO.
- Auto framing: crops and follows a subject on a locked camera.
- Beauty effects: can save editing time but may remove natural skin texture.
- Log recording: adds grading flexibility only when exposure and post-production are managed carefully.
- Vertical-video mode: convenient, though any camera can be physically rotated with suitable support.
A practical store test
- Attach the lens and microphone you would actually carry.
- Set your intended 4K mode and strongest usable stabilization.
- Hold the camera at normal arm's length and check framing.
- Walk, turn, move toward a window, and show an object to the lens.
- Listen to the recording with headphones.
- Record long enough to test heat, battery, and file handling.
- Transfer one clip and edit it on your normal device.
That seven-step test exposes more than a comparison of megapixels.
Common buying mistakes
- Buying a lens that is too tight after crop. Test the final stabilized view.
- Ignoring audio. Budget for a microphone and wind protection.
- Choosing maximum blur over focus reliability. A sharp face is the priority.
- Assuming all 4K modes are equal. Readout, crop, heat, and codec differ.
- Forgetting total rig weight. Camera, lens, mic, receiver, grip, and battery add up.
- Skipping the editing test. A file that is painful to transfer or decode slows every episode.
Frequently Asked Questions
-
It depends on the format, but reliable face-and-eye autofocus, clear audio, and a wide enough final field of view solve the most common solo-creator problems.
-
About 20–24mm full-frame equivalent is a useful starting range for handheld self-facing video. Check the exact view after sensor and stabilization crops.
-
No. Good 1080p with strong audio, lighting, focus, and storytelling is sufficient for many channels. 4K adds detail and crop room but increases storage, heat, transfer time, and editing demands.
-
A phone is faster for recording, editing, and publishing. A dedicated camera can offer better optical choices, audio connections, low-light control, and long-form handling. The better option is the one that completes your workflow reliably.
-
It is very helpful for solo framing and status checks, though a phone app or external monitor can substitute. Screen direction matters because top microphones and bottom grips can block some designs.