Symmetry Photography Tips
Find and photograph bilateral, reflection, radial, and repeating symmetry with precise alignment, clean edges, controlled perspective, and purposeful interruptions.
What counts as symmetry?
Symmetry is a correspondence of shape, spacing, tone, or visual weight. The two halves do not need to be pixel-for-pixel identical. A face, for example, is approximately bilateral but contains small differences that keep it human.
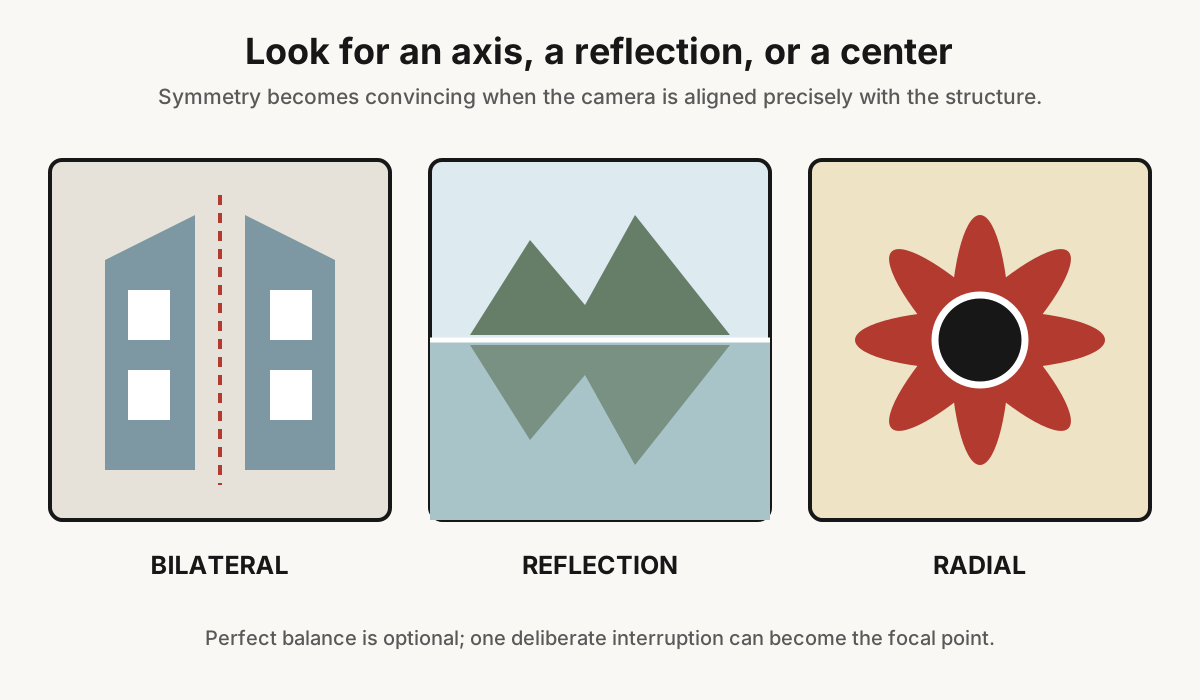
Four forms to look for
- Bilateral symmetry: left and right, or top and bottom, echo across an axis. Facades, corridors, bridges, and frontal portraits fit here.
- Reflection symmetry: water, glass, polished metal, or another surface repeats part of the scene.
- Radial symmetry: forms extend around a center, as in flowers, domes, wheels, fans, and spiral stairs viewed along their axis.
- Translational symmetry: a shape repeats across the frame—windows, seats, columns, tiles, or trees. It may be better described as pattern, but the same alignment skills apply.
Find the axis before composing
Locate the real center line of the subject. It may run through a doorway, vanishing point, person's nose, road marking, or reflection boundary. Stand on that line rather than merely pointing the camera toward it from the side.
Use floor tiles, ceiling panels, railings, and equal spacing to both frame edges as clues. Move in small steps. A sideways correction often solves the geometry more cleanly than rotating the camera.
Camera position matters more than cropping
If you stand off-axis and aim diagonally, the near side grows and lines converge differently. Cropping can center the result but cannot fully restore the viewpoint.
Move left or right until corresponding features match in scale. Change height until top and bottom relationships balance. Only then refine lens choice and framing.
Keep the sensor plane deliberate
For a flat facade, keep the sensor plane parallel to the surface when you want vertical and horizontal lines to remain parallel. Tilting the camera upward makes verticals converge. That can communicate height, but it weakens strict bilateral symmetry unless used equally.
A tilt-shift lens or perspective correction can help, but correction stretches pixels and crops edges. Leave extra room and avoid relying on extreme fixes.
Use a grid and level together
The electronic level detects roll and sometimes pitch. It does not confirm that you occupy the building's center or that the lens points exactly along a corridor.
Use display grid lines to compare repeated features with both edges. Check that the central axis remains straight and that matching elements meet the frame at comparable positions.
Lens choice
A wide lens includes more structure and emphasizes depth, but small alignment errors become conspicuous near the edges. A longer lens narrows the scene and compresses distance, which can simplify repeated layers.
Lens distortion can bend lines, especially near the frame boundary. Apply the correct lens profile before judging final symmetry, and avoid placing critical straight edges where uncorrected distortion is strongest.
Reflections
Still water can create near-perfect top-bottom symmetry. Wind, current, rain, and subject movement break it. Early morning often brings calmer surfaces, but location conditions matter more than the clock.
Choose where the reflection axis sits. Centering it creates equal halves; moving it up or down can emphasize the real subject or its abstract reflection. Focus usually stays on the reflected subject's apparent distance rather than the water surface unless surface texture is the point.
A polarizer may reduce reflection—the opposite of what you want. Rotate it while watching the water and remove it if the reflected image weakens.
Radial subjects
For a flower, dome, ceiling, wheel, or spiral staircase, place the lens directly above, below, or in front of the center where safe and permitted. Even a small lateral offset turns circles into ellipses and makes repeated segments unequal.
Depth of field can be limited in close work. Keep the camera parallel to a flat subject, focus carefully, and stop down within diffraction and shutter-speed limits.
Portrait symmetry
A straight-on portrait with centered eye contact can feel formal, confrontational, calm, or iconic. Align the head and shoulders, but do not force a person's natural features into artificial perfection.
Lighting can reinforce or disrupt symmetry. Centered frontal or overhead light balances both sides; side light makes the pose symmetrical while the tone is not. Either can work if the difference is intentional.
Patterns and repetition
Fill the frame with repeated windows, chairs, shelves, or natural forms. Align the camera so rows remain consistent, then look for the one variation—a person, open window, different color, or missing object.
The interruption becomes the focal point because the surrounding order establishes an expectation. Make it clearly deliberate; an accidental half-object at the edge usually looks like careless framing.
Breaking symmetry on purpose
Perfect balance can feel static. A small unequal element adds narrative: one figure in a corridor, a bird in reflected sky, one lit window, or a hand entering a centered portrait.
Keep the underlying axis strong enough to remain legible. If several unrelated elements break it, the viewer may see clutter rather than contrast.
Exposure and color balance
Matching shapes with very different brightness may not feel balanced. Watch windows, lamps, sky openings, and patches of sunlight. Bracket a static scene when dynamic range exceeds one exposure, but merge carefully so both sides retain believable tone.
Mixed light can make one side warm and the other cool. That can add interest, or it can look accidental. Use a fixed white balance for consistency and local correction only when it supports the real lighting.
Moving subjects
Choose the symmetrical background, set focus and exposure, and wait for the moving element to reach the axis or intended offset. Continuous shooting can help with steps and gestures, but make the final selection based on body shape and spacing, not merely central position.
For traffic, trains, escalators, and public spaces, stay within legal, safe areas and never step into a restricted position for alignment.
Editing a symmetrical frame
- Enable the lens profile.
- Correct roll and, where appropriate, perspective.
- Place a guide on the intended axis.
- Crop equal relationships at left and right or top and bottom.
- Inspect every corner at 100 percent.
- Remove only minor distractions within the ethical limits of the genre.
Do not mirror one half merely to manufacture documentary or architectural accuracy. A digitally constructed reflection can be valid art, but it should not be represented as an unaltered scene.
Common mistakes
- Centering the crop while standing off-axis. Move the camera position first.
- Trusting only the level. Compare scale and spacing on both sides.
- Tilting a wide lens carelessly. Convergence and distortion reveal small errors.
- Cutting repeated elements inconsistently. Inspect frame edges and corners.
- Using a polarizer without checking the reflection. It may remove the subject you want.
- Correcting everything into sterile perfection. Small natural differences can keep the image alive.
A practice exercise
- Find a doorway, corridor, or facade with a clear center.
- Make a frame from one step left of center.
- Move onto the axis and compare scale on both sides.
- Make a perfectly centered image.
- Add one person or object slightly off-axis.
- Compare which version communicates order, depth, or tension most clearly.
Symmetry is strongest when it is seen and aligned at capture. Editing can polish the geometry, but it cannot replace the correct viewpoint.
Frequently Asked Questions
-
It is a visual correspondence of elements across an axis, around a center, through a reflection, or across a repeating pattern.
-
Find the building's true center, place the camera on that axis, align the sensor plane deliberately, compare both edges with a grid, and correct lens distortion before the final crop.
-
Bilateral and radial symmetry usually benefit from centering, but reflection boundaries and repeating patterns can be placed off-center when one area deserves more emphasis.
-
You may be level but off-axis, too close to one side, tilted relative to the subject, or affected by lens distortion, unequal light, and inconsistent edge crops.
-
Yes. One person, color, open window, or gesture can become a strong focal point when the underlying symmetrical structure remains clear.